


Building a foundation
Set up your first system structure so everything has a clear place to live.
This guide walks you through building your first practical RunWAi setup. The goal is not to configure every possible feature on day one. The goal is to create a simple operating structure that RunWAi can understand, that your team can follow, and that you can later improve with automation.
What you are building
RunWAi works around resources and objects. A resource is a type of work, such as Leads, Posts, Messages, or Appointments. An object is one item inside that resource, such as one sales lead, one post, one message template, or one meeting.
Each object has attributes, a status, actions, ownership, conversations, and a place in a parent-child structure. That structure is what allows RunWAi to show useful recommendations, populate the Home page, build charts on the Overview page, and later run AI or automation against the right work.
1) Complete the context setup first
Start with Onboarding, then review your User Profile and Company Profile.
This context matters because RunWAi uses it when it drafts recommendations, chooses relevant defaults, and understands whether work belongs to you personally or to the wider company workspace. Fill in what the business does, who it serves, what outcomes matter, and any platform access you want enabled.
Before creating objects, check that the company profile contains enough information for an assistant to represent the business accurately. A good starting profile usually includes your offer, ideal customers, locations served, tone of voice, and the main process you want RunWAi to support.
2) Choose one workflow to model first
Do not begin by building every resource at once. Pick one workflow that already happens in the business and turn that into your first RunWAi structure.
For Lead the WAi, a strong first workflow is usually one of these:
- A lead pipeline: find prospects, research them, contact them, book demos, and track outcomes.
- A content pipeline: collect ideas, draft posts, generate assets, schedule publishing, and review results.
- An outreach sequence: build message templates, link them to leads, send follow-ups, and track replies.
Write the workflow as a short sentence before creating anything. For example: "We need to research local accounting firms, contact the best matches, and book discovery calls." That sentence tells you which resources you need and which objects should exist first.
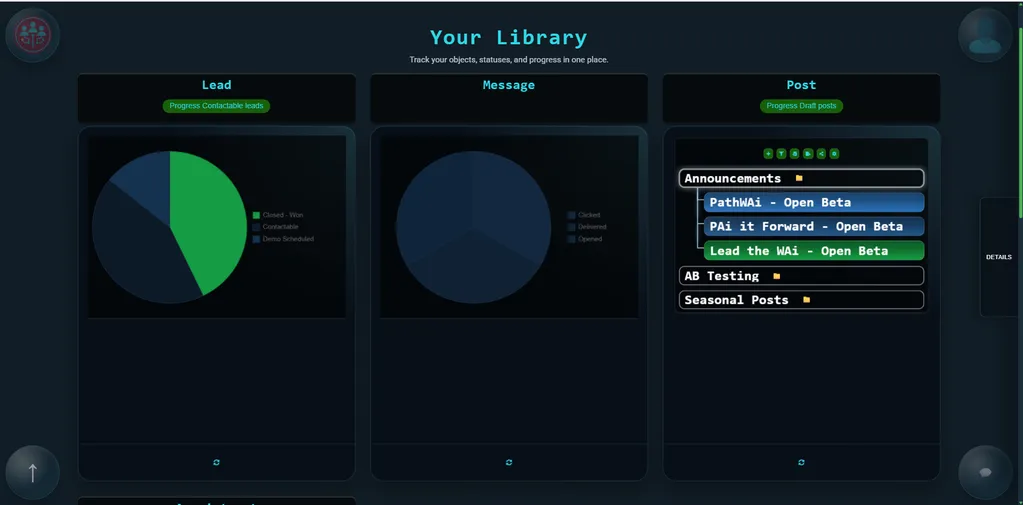
3) Create a simple resource map
Open the Library page and identify the resource tiles you need for the chosen workflow.
For a lead pipeline, start with Leads. Add Posts, Messages, and Appointments only when they support the pipeline. For a content pipeline, start with Posts, then add Messages or Leads when the content is tied to outreach.
A good first map is small:
- One folder object for the overall campaign or process.
- Five to ten child objects that represent real work.
- One clear owner for each object.
- One current status per object.
Objects can work like folders when you need hierarchy. For example, a Lead folder named "North London accountants" can contain individual company leads, while a Post folder named "May awareness campaign" can contain each planned post.
4) Create your first objects with useful names
Use the New action from the relevant resource tile or from inside a folder object.
Use names that help people scan the Library without opening every item. "Prospect list - Bristol manufacturers" is stronger than "List". "Launch post - bookkeeping pain points" is stronger than "Post 1".
For each object, add at least:
- Name: a short label that identifies the work.
- Description: the context an AI assistant or teammate needs to understand the object.
- Status: where the object is in its lifecycle.
- Configuration: the version of the object that matches the work, such as a Company or Person lead, or a Text, Image, PDF, Video, or Storyboard post.
The description is especially important. RunWAi can use description changes to produce recommendations, and AI-assisted progress is much stronger when the object contains the relevant business context.
5) Pick configurations before filling every field
Configurations control which attributes are relevant for an object. Choose them early so users do not waste time filling fields that do not apply.
Common examples:
- Lead objects can be configured as Company or Person, changing the fields shown for contact details, company information, pain points, goals, and follow-ups.
- Post objects can be configured as Text, Image, PDF, Video, or Storyboard, changing which content, media, schedule, and publishing fields matter.
- Message objects can be Single, Template, Sequence, or Routing, depending on whether you are sending one message or building a reusable outreach flow.
If you are unsure, start with the simplest configuration and expand later. A clean small object is easier to automate than a large object full of half-used fields.
6) Define the lifecycle in plain language
Status is not just a label. In RunWAi, status drives progress indicators, recommendations, Home page events, Overview reporting, and automation triggers.
For a Lead pipeline, a useful early lifecycle is:
- Draft: created but missing key information.
- Contactable: has an email, phone number, LinkedIn profile, or another clear contact route.
- Researched: enough notes exist to understand needs, fit, or approach.
- Prospect: worth approaching as a potential opportunity.
- Contacted: outreach has started.
- Qualified Lead: confirmed as a good fit.
- Demo Scheduled, Proposal Sent, Negotiation, Closed - Won, or Closed - Lost: later commercial stages.
For Posts, the practical flow is usually Draft, Researched, Composed, Finalized, Scheduled, and Published. Keep your initial statuses honest. If the team cannot explain what must be true for an object to be in a status, the status is too vague.
7) Add ownership before adding automation
Use Assign when a person needs to own the next step. Use Submit when work needs to move from a personal workspace into the company workflow for review or approval.
RunWAi separates personal and company work. In user mode, you are usually looking at your own objects. In company mode, you are looking at shared objects that may require company-level access. Decide which objects should stay personal and which should be visible to the team.
As a rule, keep experiments personal and make repeatable operating workflows company-owned.
8) Check the Resource Viewer for each object
Open each important object in the Resource Viewer. This is where you confirm the object has the right actions, attributes, settings, navigation, collaboration, and conversation history.
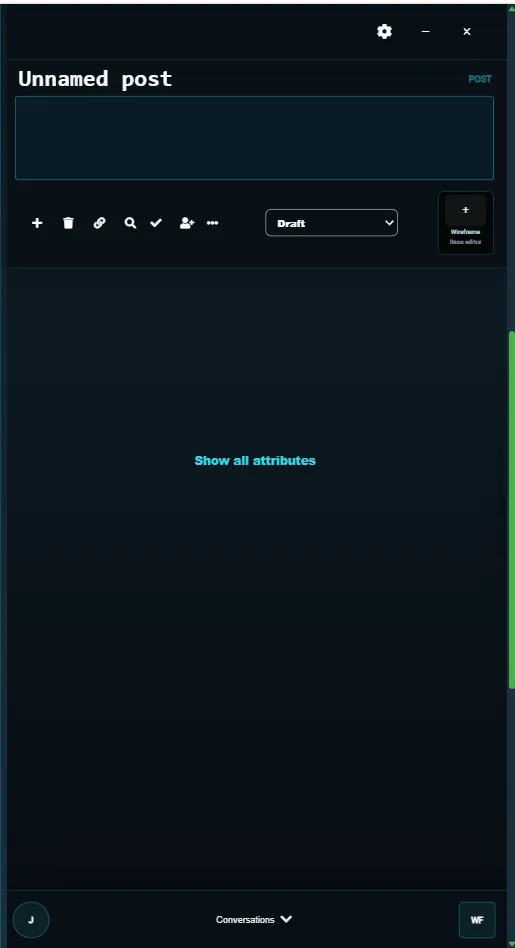
Before moving on, check that:
- The object sits under the right parent or resource.
- The configuration matches what the object is meant to do.
- The status reflects the real state of the work.
- The description contains enough context for another person to continue.
- The owner or company scope is correct.
- Comments or follow-ups capture important decisions.
9) Run one real work cycle manually
Use the foundation for real work before turning on automation. Create a few objects, update their attributes, move their statuses forward, assign work, submit anything that needs approval, and review the results on the Home and Overview pages.
This gives you a baseline. You should be able to answer these questions without guessing:
- Where should a new item be created?
- Which fields must be filled before the item can move forward?
- Who owns the next step?
- Which status means "ready for AI" or "ready for review"?
- Where should the team look each day to see what needs attention?
10) Only then add the first automation
After the manual workflow feels clear, move to Creating automated pipelines. Start with one low-risk automation, such as moving an object when it reaches a certain status, assigning it to a reviewer, or creating a linked follow-up object.
RunWAi automation works best when the foundation is consistent: clear statuses, useful descriptions, correct ownership, and a small number of predictable resource types. If those are in place, automation becomes a multiplier rather than a source of confusion.
Foundation checklist
- Onboarding and company profile are complete enough to guide recommendations.
- One workflow has been chosen as the first implementation.
- Resource tiles and folder objects match the real workflow.
- Objects have clear names, descriptions, configurations, statuses, and owners.
- Lead, Post, Message, or Appointment fields are filled only where they support the workflow.
- Status definitions are understood by the team.
- At least one manual work cycle has been completed before automation is added.
Read next: Creating automated pipelines
Continue to Creating automated pipelines.