


Your First Day With Lead the WAi: What Actually Happens
Your first day with a new platform is usually the hardest. You log in, see a blank dashboard, and immediately wonder where to start — or worse, whether you’re about to spend hours setting things up before anything useful happens.
This walkthrough shows what actually happens on your first day with Lead the WAi, starting from the moment you sign in for the first time. To keep things simple and realistic, this example focuses on just one object type: Posts. The experience is the same for leads, appointments, and other objects — but posts are often the easiest place to begin.
The goal on day one is simple: get a full workflow moving.
You’ll go from zero to written posts, organised into a folder, and pushed all the way through to scheduled — all within the same session.
First Login: Orientation, Not Overwhelm
When you sign in for the first time, you land on the Home page. Rather than dropping you into a fully open interface and expecting you to explore on your own, Lead the WAi starts with a short guided tutorial.
The tutorial overlays the interface and walks you through the main areas of the platform step by step. It explains what each page is for, how to move between them, and what role they play in your day-to-day workflow. You can go through it at your own pace or skip it entirely — but for most users, it’s a fast way to get your bearings.
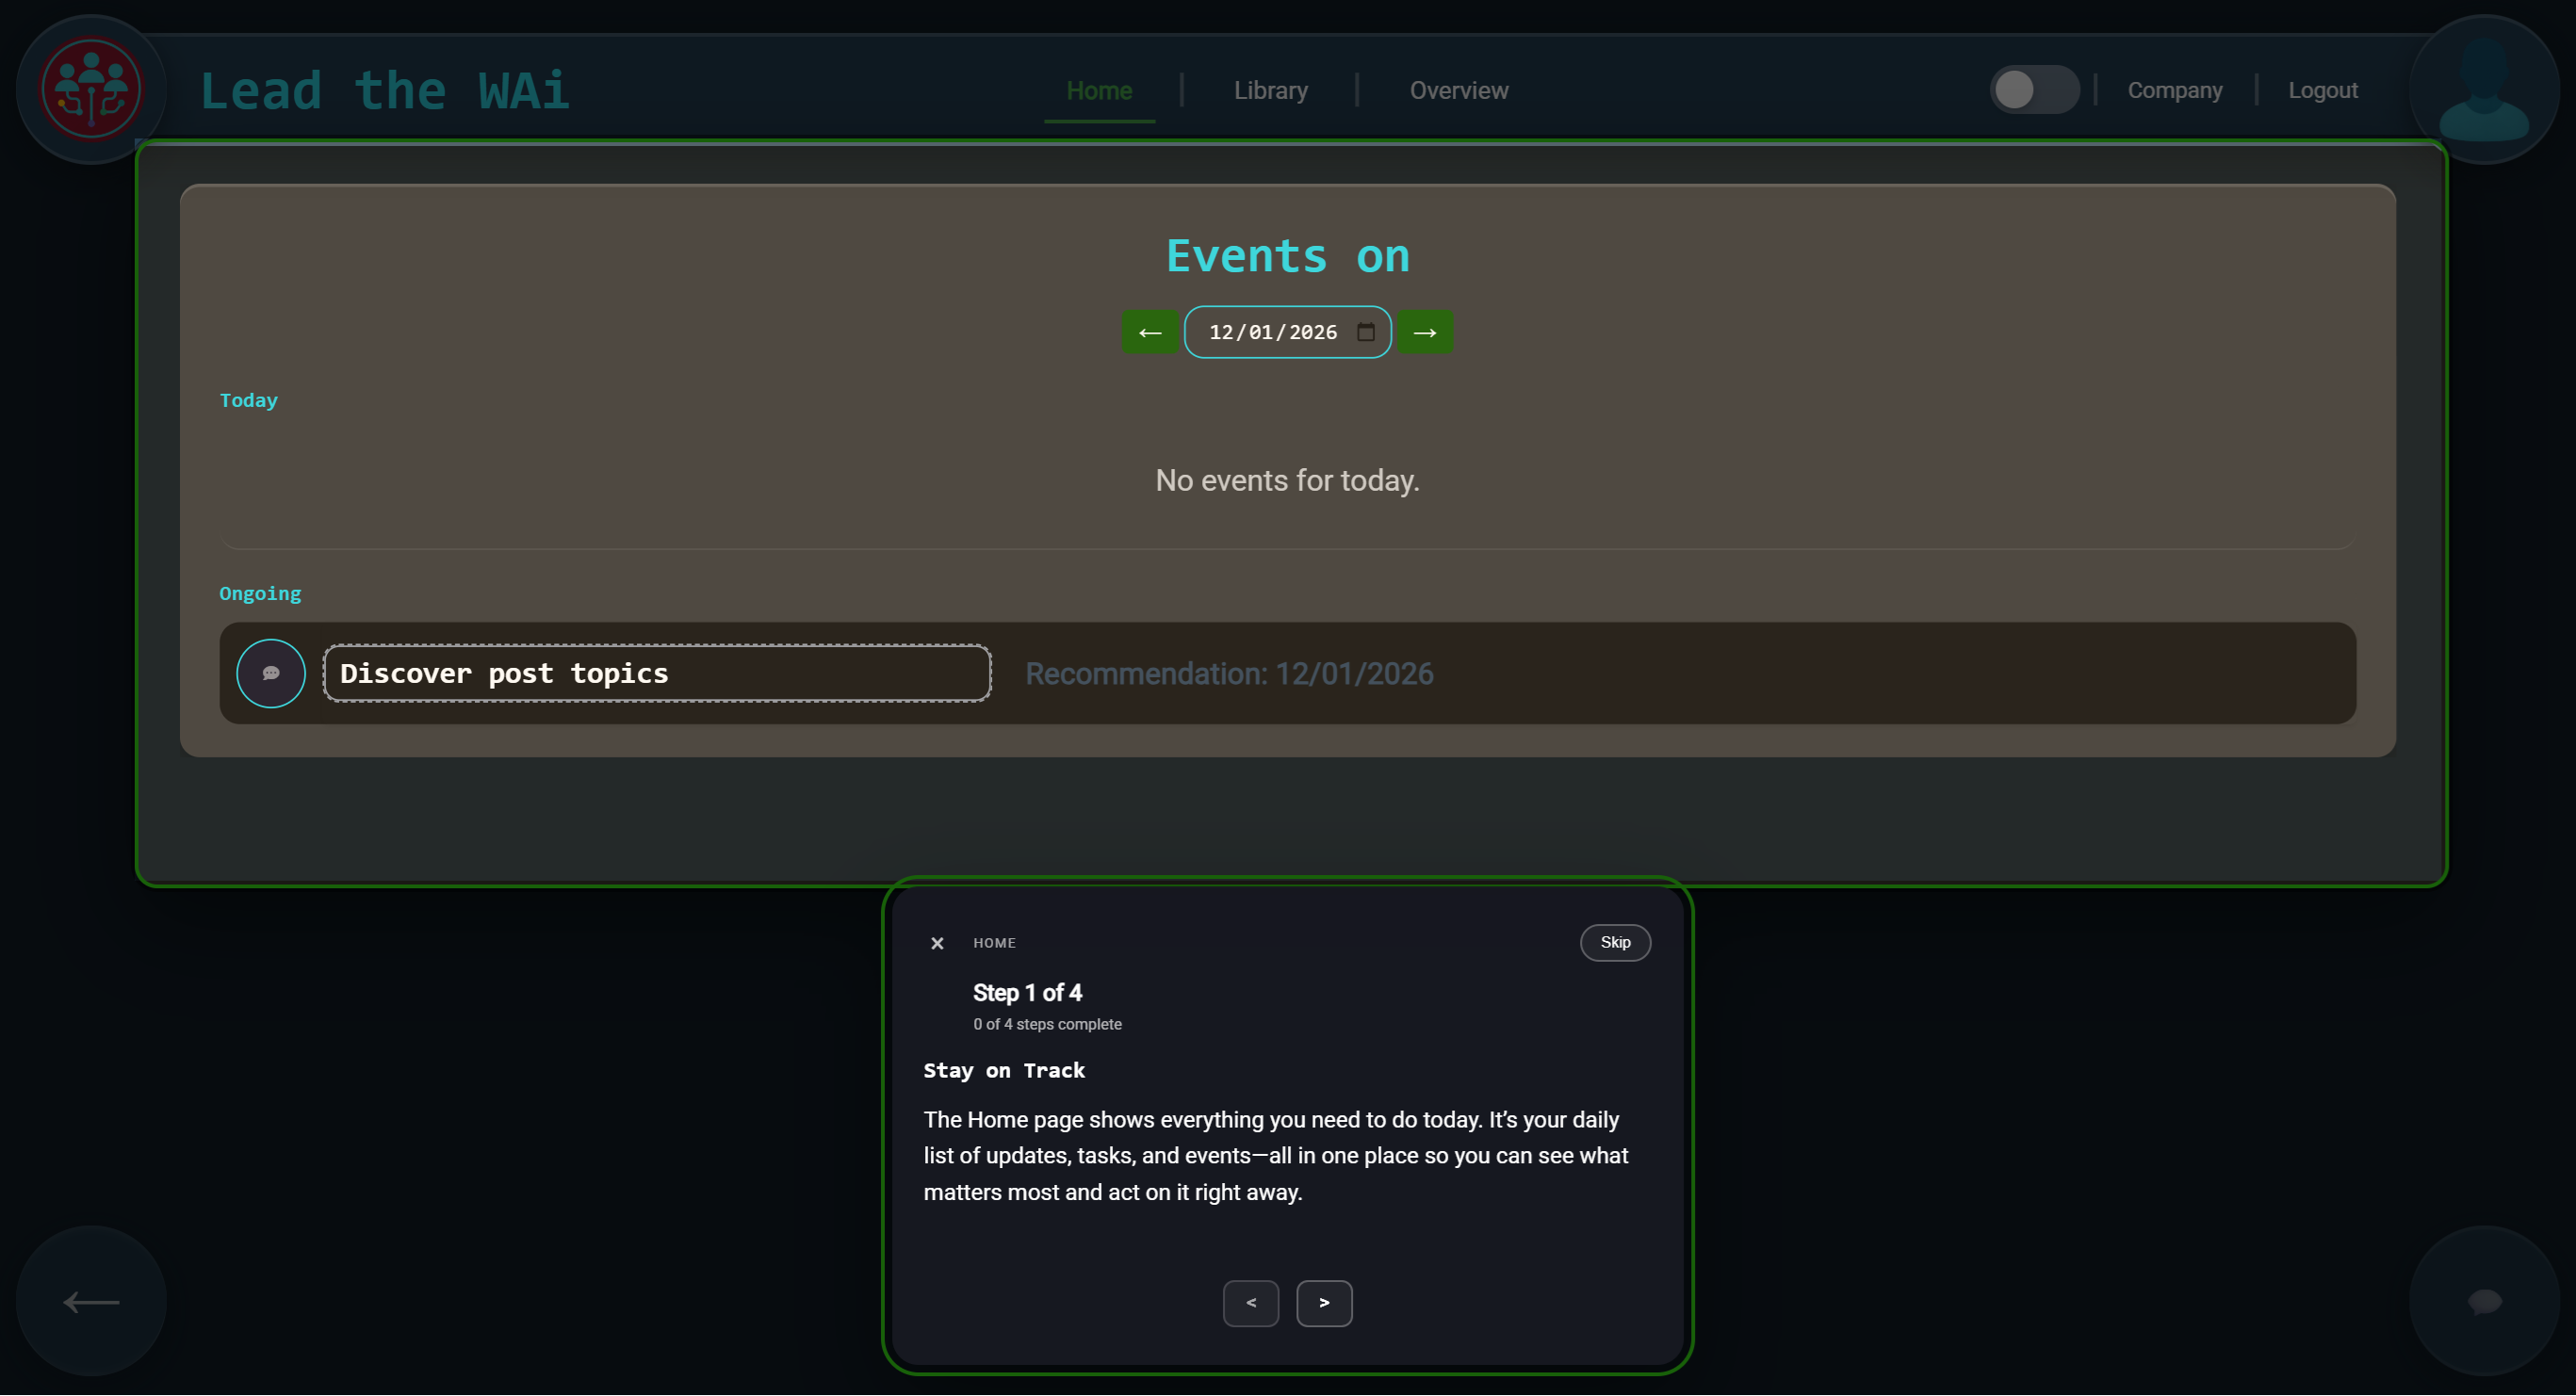
Your first login includes a guided tutorial that explains how the Home page works and what to focus on.
One of the pages the tutorial highlights is your User Profile. This is an important early stop, because it’s where you connect the tools Lead the WAi will work with on your behalf.
Setting Things Up: Connecting Your Accounts
Inside your User Profile, you’ll find an Integrations section. This is where you can connect accounts like LinkedIn, Facebook, and WordPress.
You can explore the platform without setting these up immediately, but it’s usually worth doing early. Connecting your accounts means that when you start drafting posts, reviewing content, and scheduling work, Lead the WAi already knows where that content can go.
Importantly, connecting an integration doesn’t mean anything is posted automatically. It simply gives the system permission to prepare content for those channels and, when you approve it later, publish on your behalf.
Once your integrations are connected, the rest of the platform starts to feel more grounded. You’re no longer working in the abstract — you’re setting things up for real channels you already use.
Day One: The Home Page and Your First Recommendation
After the tutorial and initial setup, you’re back on the Home page.
This is the page you’ll come back to most often, because it’s where Lead the WAi keeps your day organised. Events are grouped into two simple areas: Today and Ongoing.
You’ll also notice a small symbol on the left of each event.
Early on, when you haven’t created anything yet, the Home page uses a speech bubble icon. That’s Lead the WAi nudging you toward a quick conversation with Chat Daemon to get started. Clicking it opens the chat.
Once you’ve created a few posts, the symbols change. You’ll start seeing a tick icon instead — because the events now feel more like a simple checklist of things to move forward. When you’ve dealt with one, you can check it off and keep going.
And once you’ve set things up properly, you’ll also start seeing events with an egg timer icon. These are scheduled events that will happen automatically — so instead of reminders and manual follow-ups, the system progresses the work for you.
In this example account, we’re keeping things intentionally minimal. Only Posts are enabled, and there aren’t any in the system yet.
So rather than showing you a blank feed, Lead the WAi gives you a clear starting point.
This is where Chat Daemon steps in.
Chat Daemon is the AI that guides the workflow inside Lead the WAi. When there’s nothing to work on yet, it creates an event to help you add your first posts and get the ball rolling.
In this case, the suggestion is straightforward: “Discover post topics.”
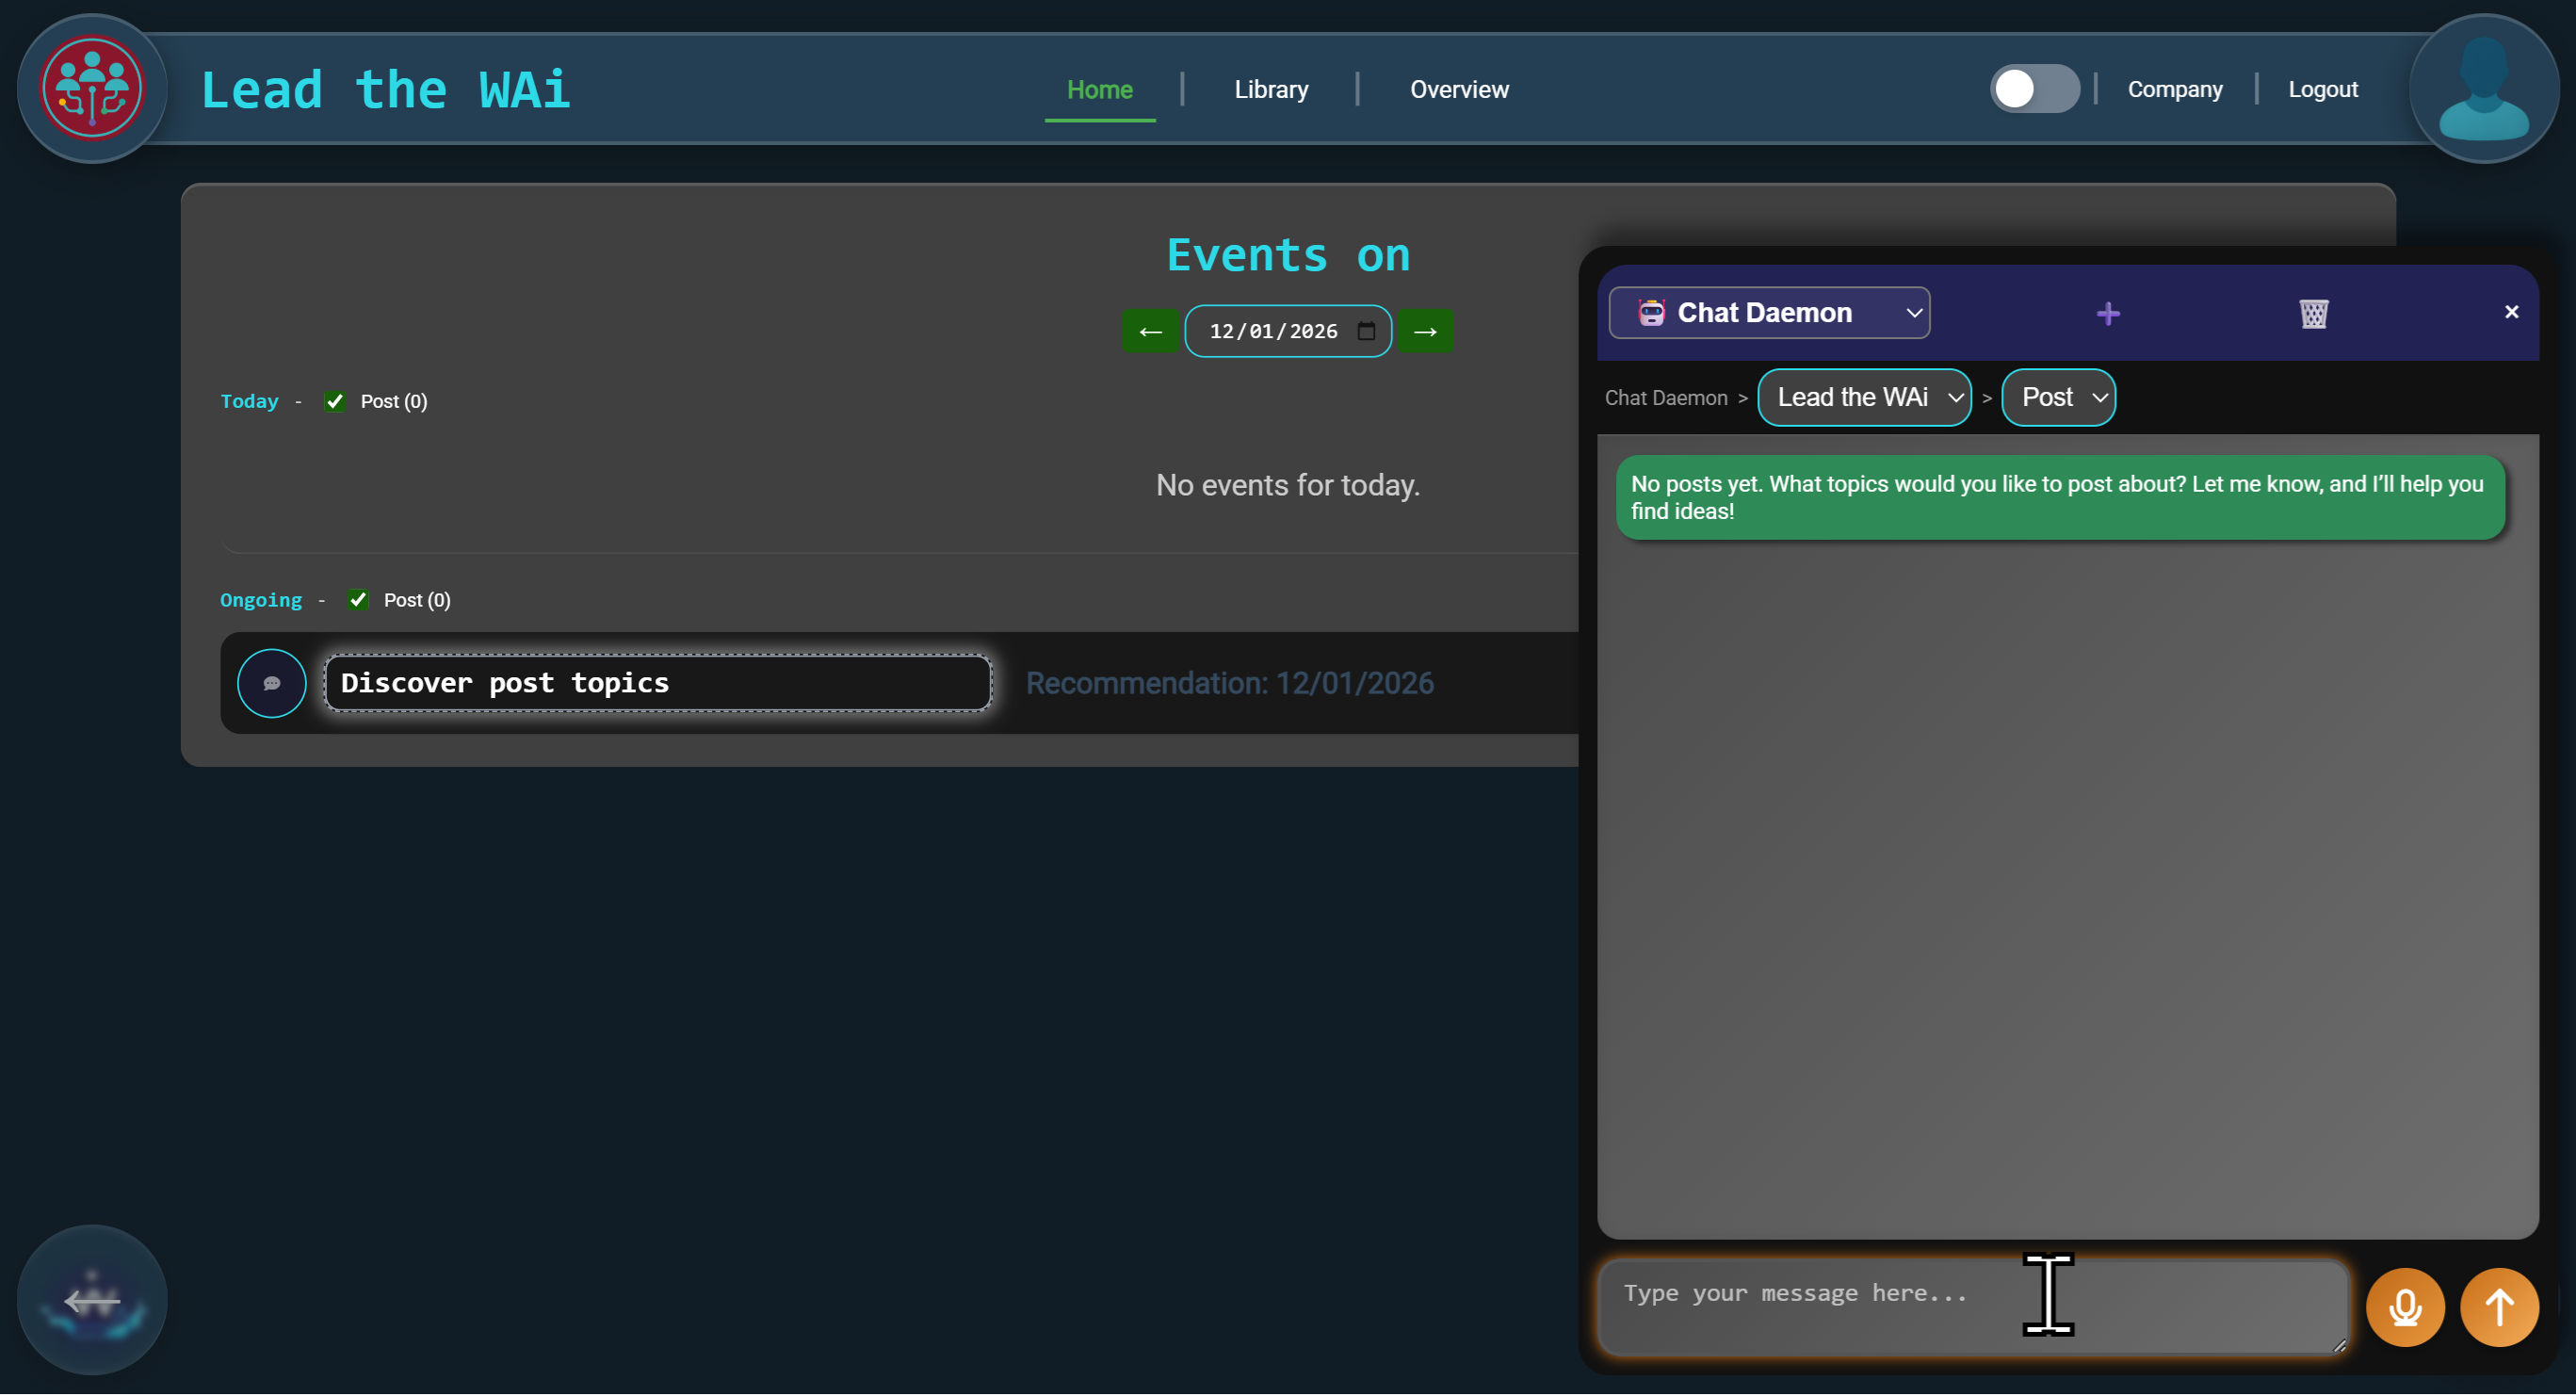
With no posts yet, the Home page shows a recommendation event suggesting a useful next step.
It’s a small moment, but it sets the tone for how the platform works. You don’t have to hunt through menus or guess what to do next — the system looks at what’s missing, and gives you a sensible first step.
From Recommendation to Draft Posts (The First Workflow Starts)
When you click the “Discover post topics” recommendation, a focused conversation opens with Chat Daemon.
The first message is deliberately simple:
“No posts yet. What topics would you like to post about? Let me know, and I’ll help you find ideas.”
You don’t need a detailed brief to begin. In this example, the response is broad:
“I want to do some posts about AI.”
From that single prompt, Chat Daemon suggests a short list of SEO-optimised post topics, each with a clear angle and intended audience — from beginner-friendly explainers to more practical business-focused content.
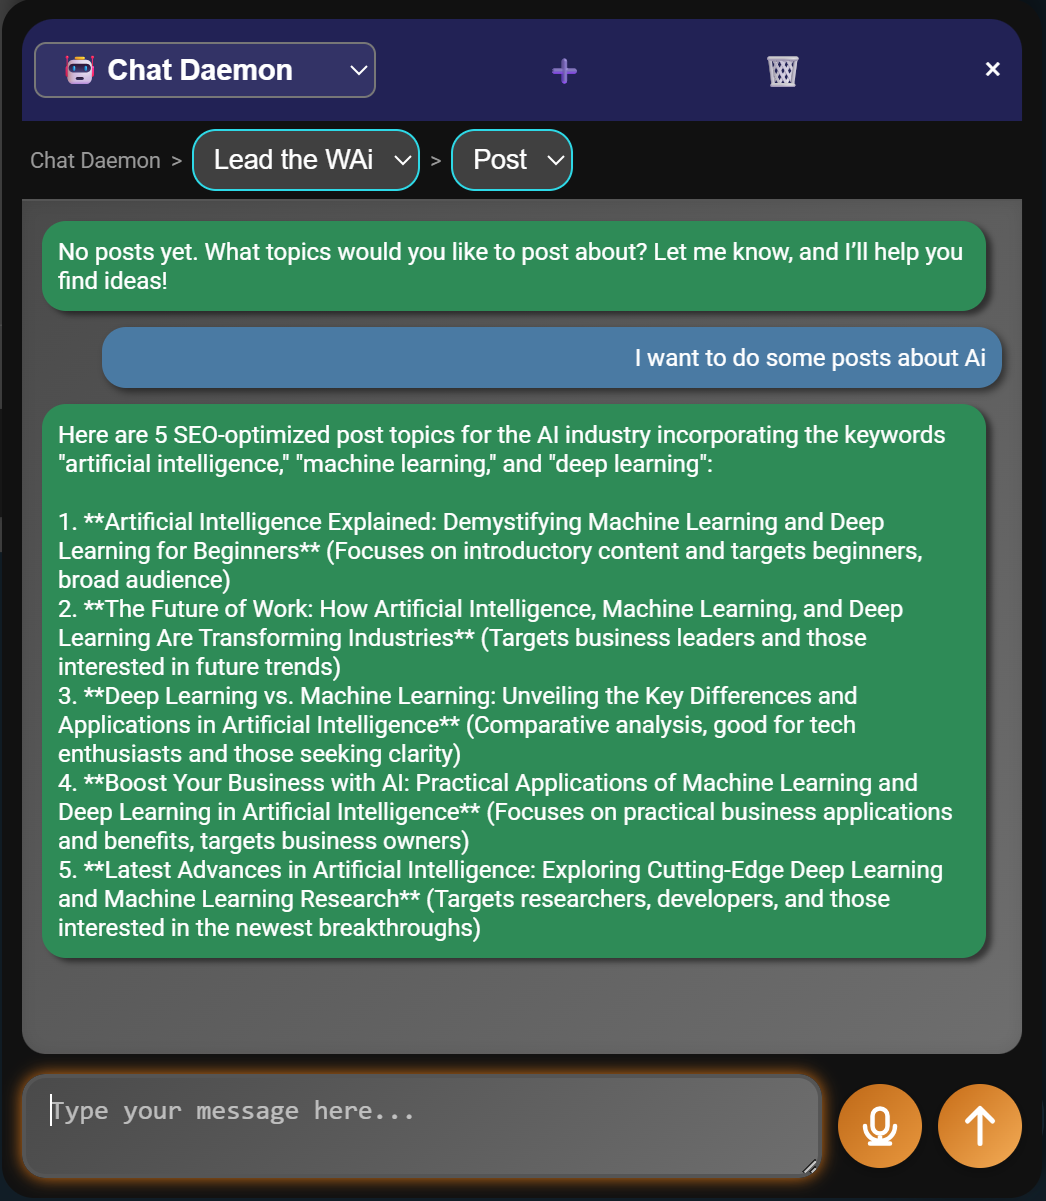
The AI suggests SEO-optimised post topics based on a simple description of what you want to write about.
When you choose the ones you like — in this case, two options — Lead the WAi turns those ideas into posts inside the system.
They’re created instantly and saved in Draft status. And because they now exist as real objects, they don’t just live inside the chat — they start appearing across the platform wherever your posts are shown.
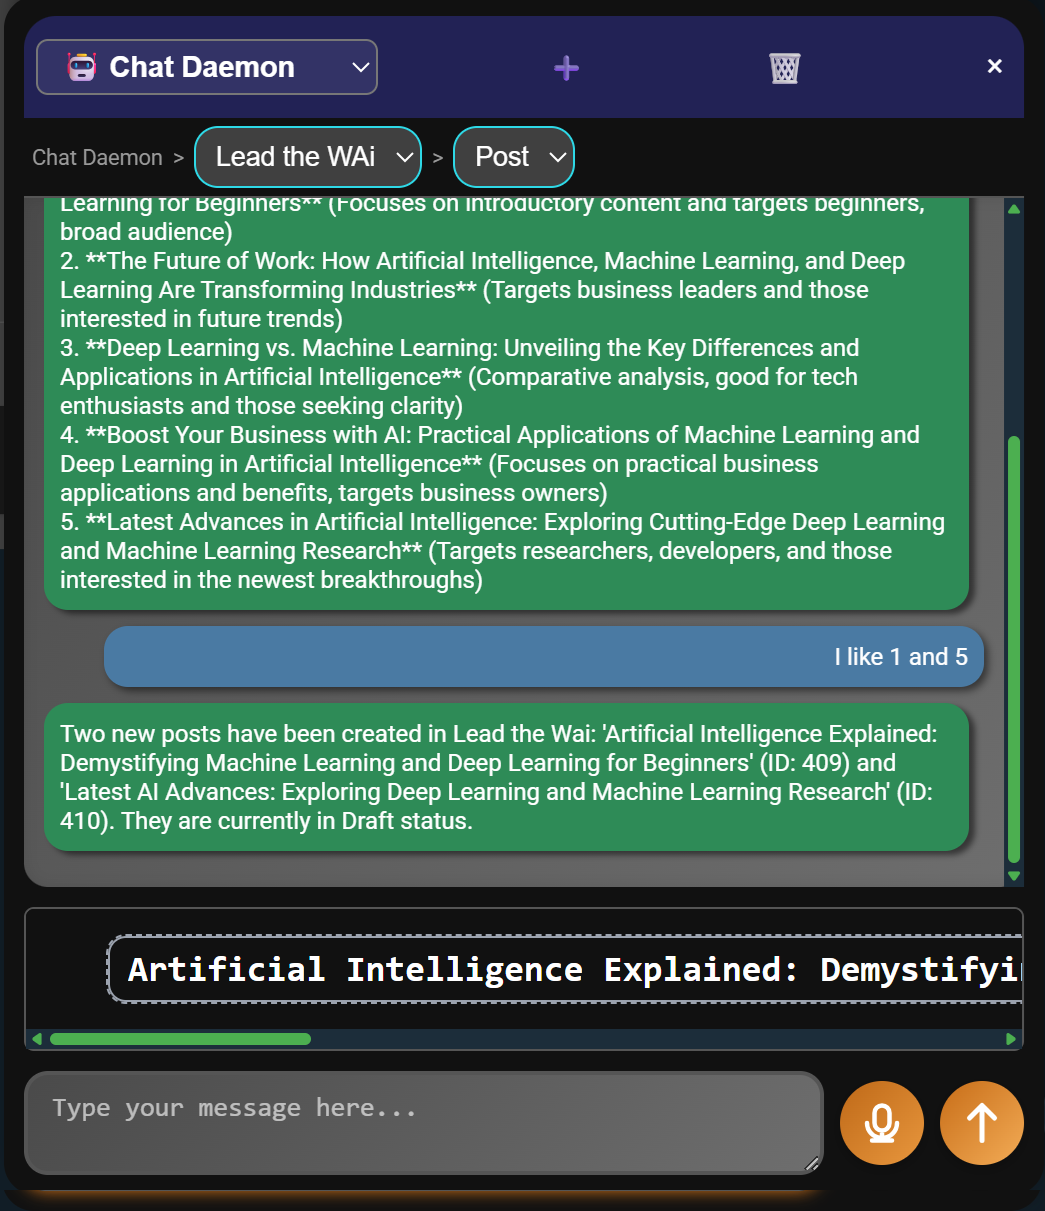
Selected topics are immediately converted into draft Post objects inside the system.
At this point, the workflow has already started.
Ideas are no longer just text in a conversation. They’re structured objects that now shape what happens next.
Opening Your First Post Object
Once the posts are created, they appear inside the conversation as clickable items.
This is easy to overlook the first time you see it, but it’s important.
These aren’t previews or shortcuts — they’re the actual post objects you just created. Clicking one opens the full object popup, where you can see the post’s details such as its name, description, and current status.
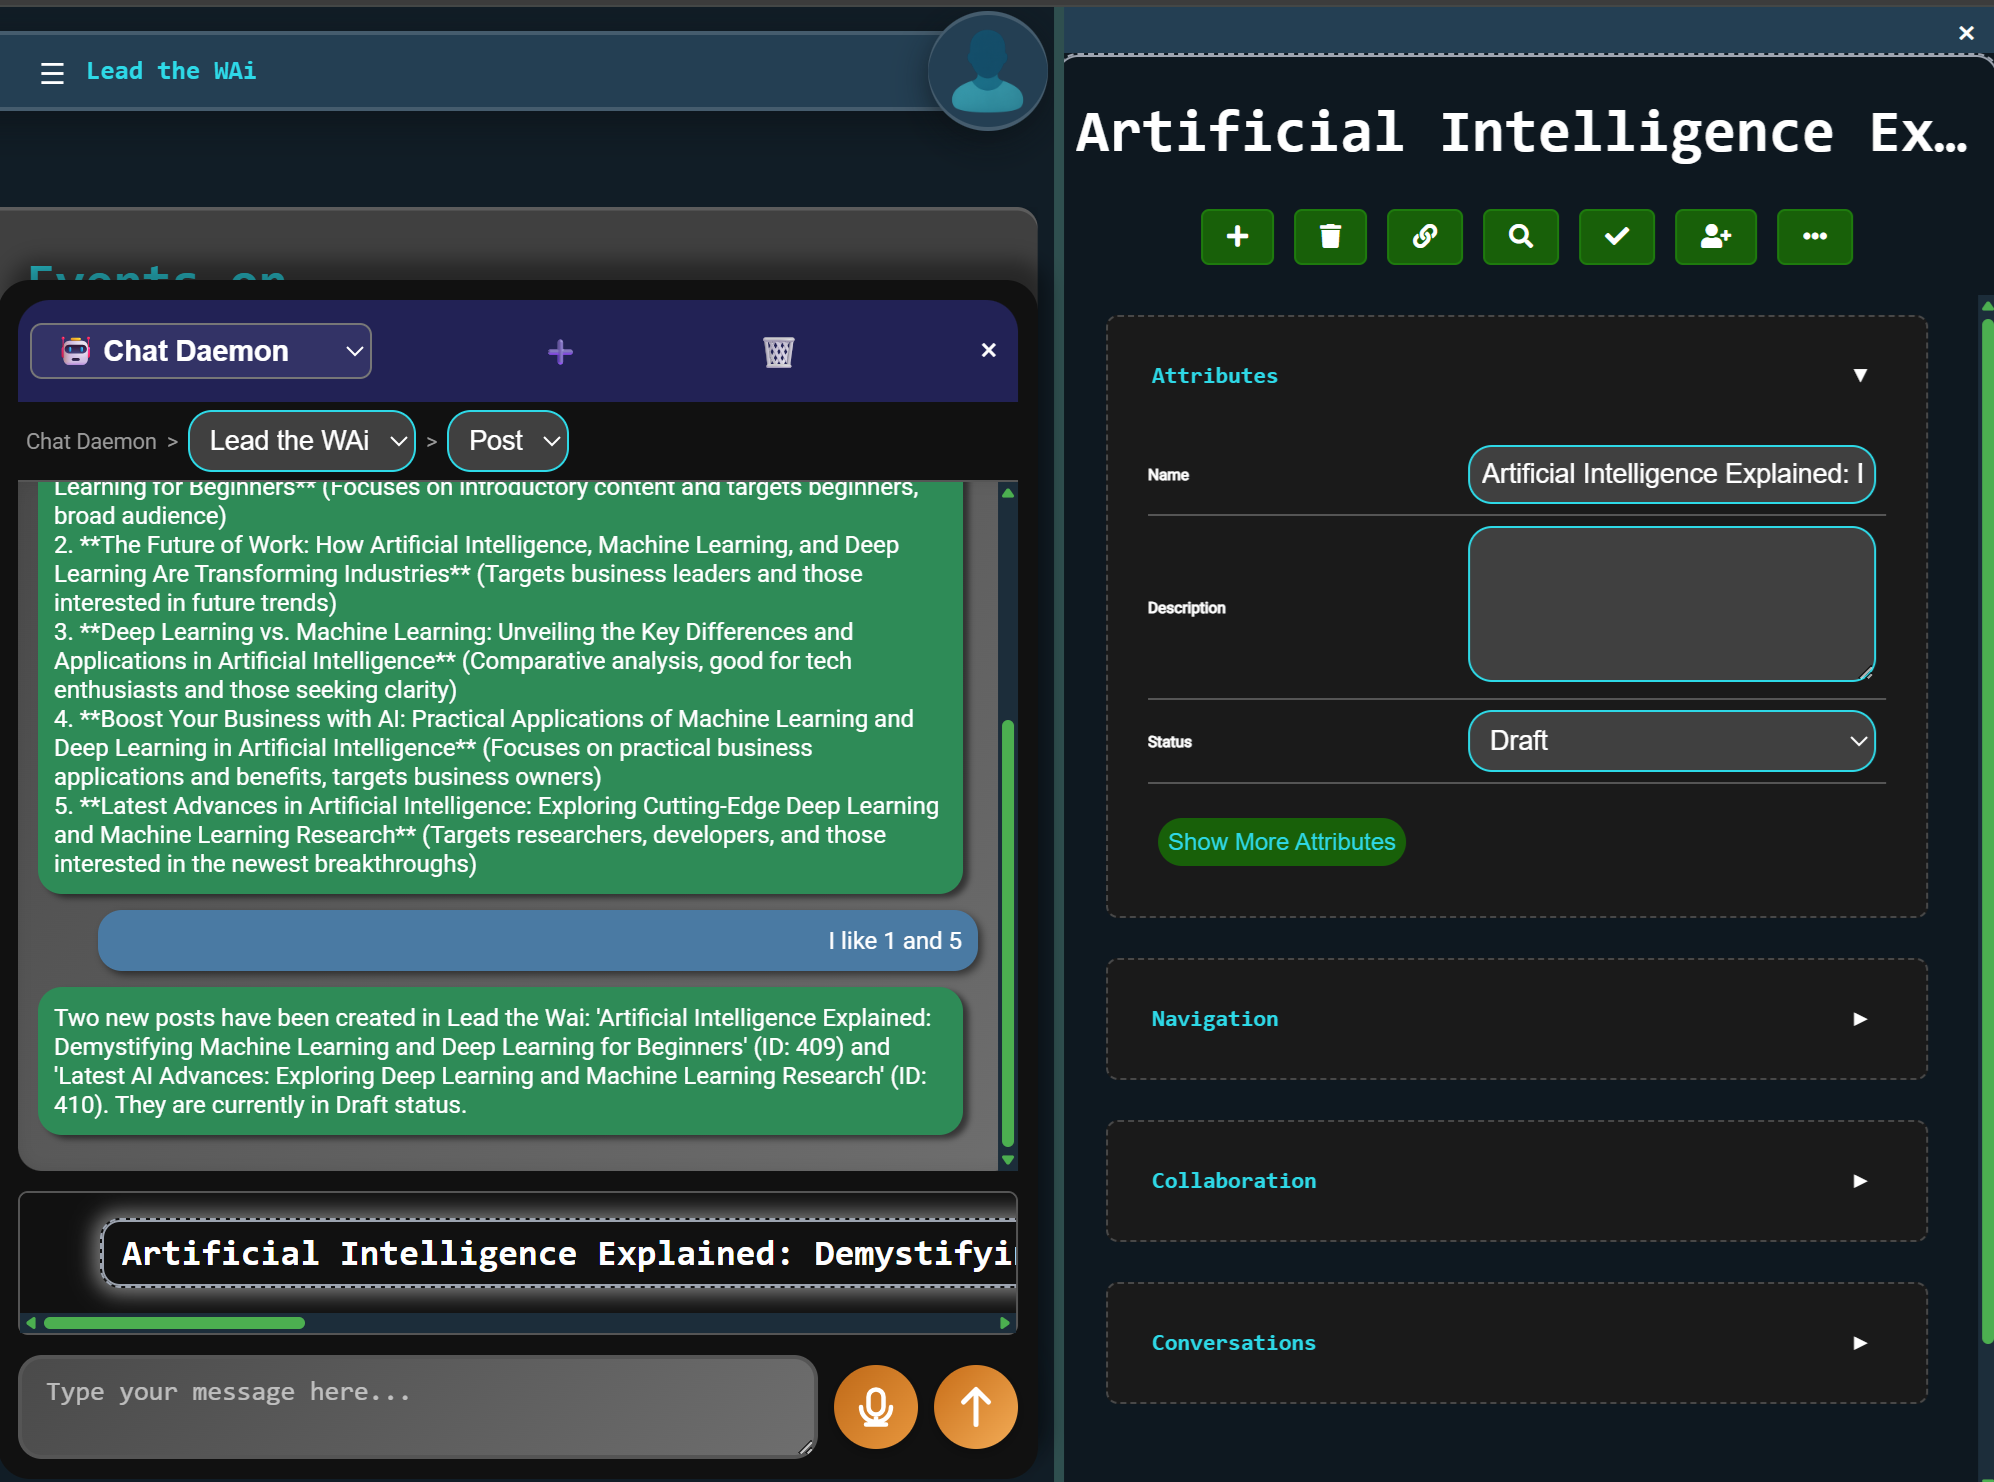
Context objects in chat open the full object popup for the selected post.
This is where the work becomes tangible.
From here, you can start writing the post yourself, make edits, or hand it over to an AI agent to move it forward.
The Home Page Starts Reflecting Your Work
Once posts exist in the system, the Home page changes.
The original “getting started” event disappears, and it’s replaced by events based on the posts you’ve created — meaning Lead the WAi now reacts to real work in progress, not generic onboarding steps.
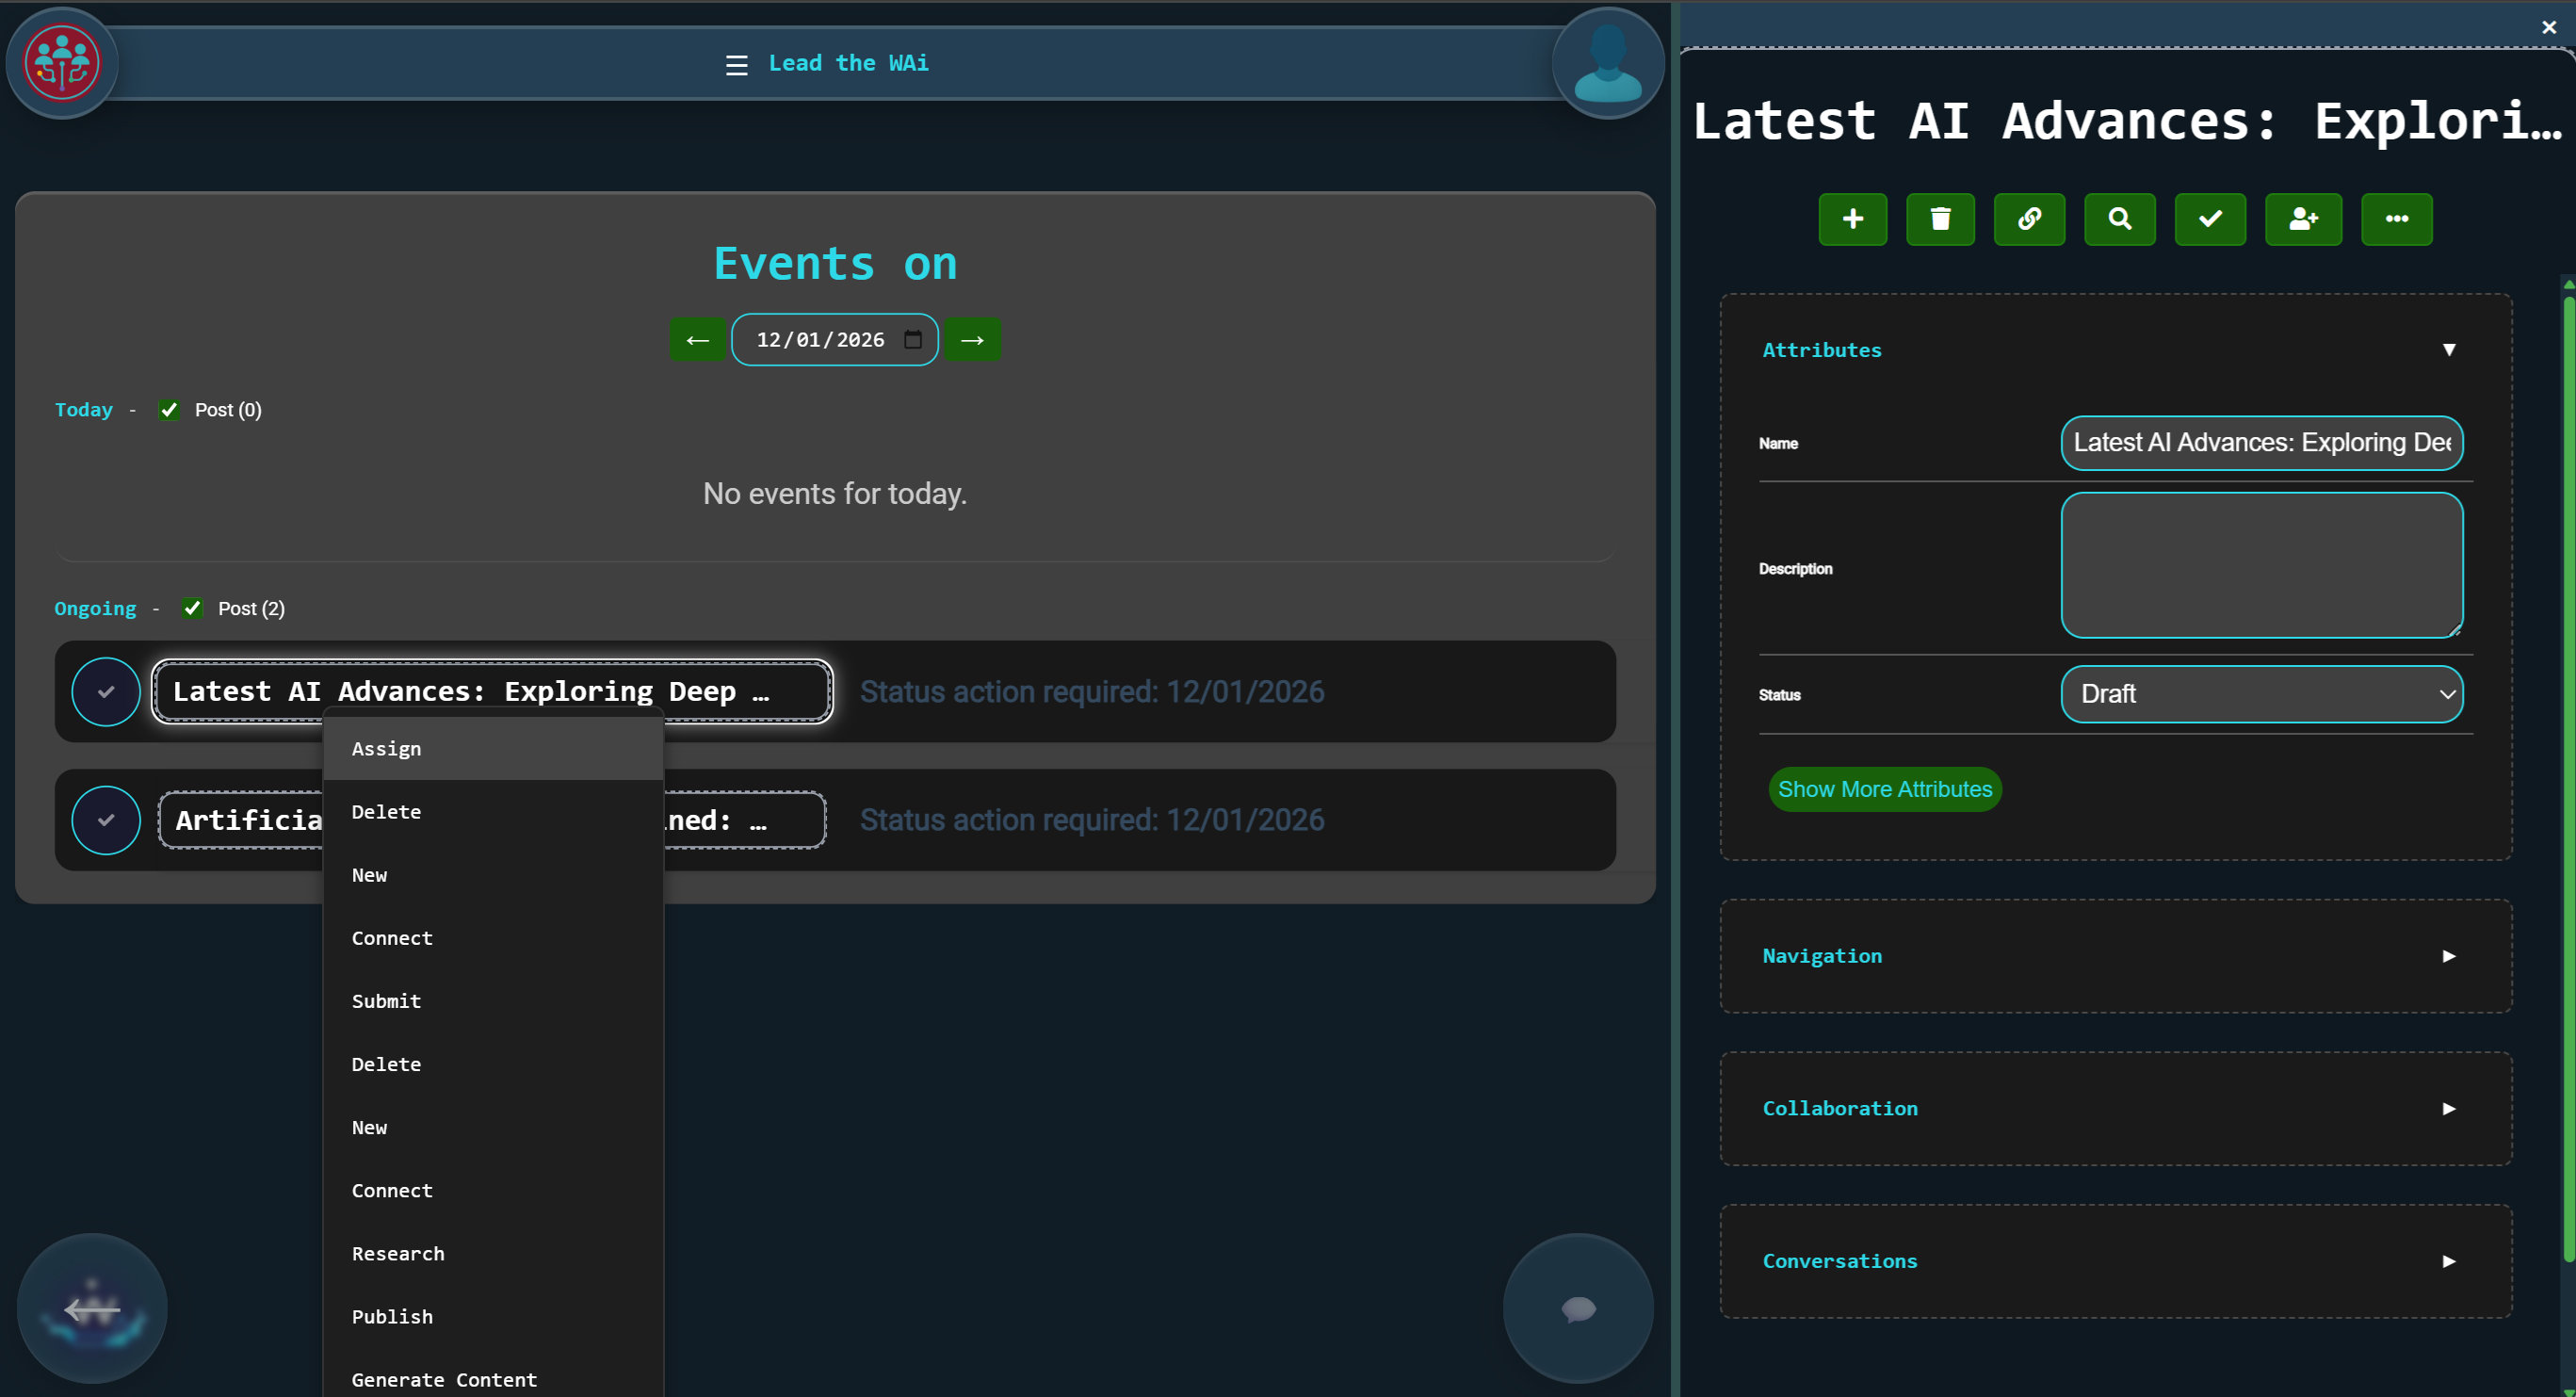
Once posts exist, the Home page switches from recommendations to object-driven events.
This is the point where the platform stops feeling like a blank dashboard and starts feeling like a system that’s already moving with you.
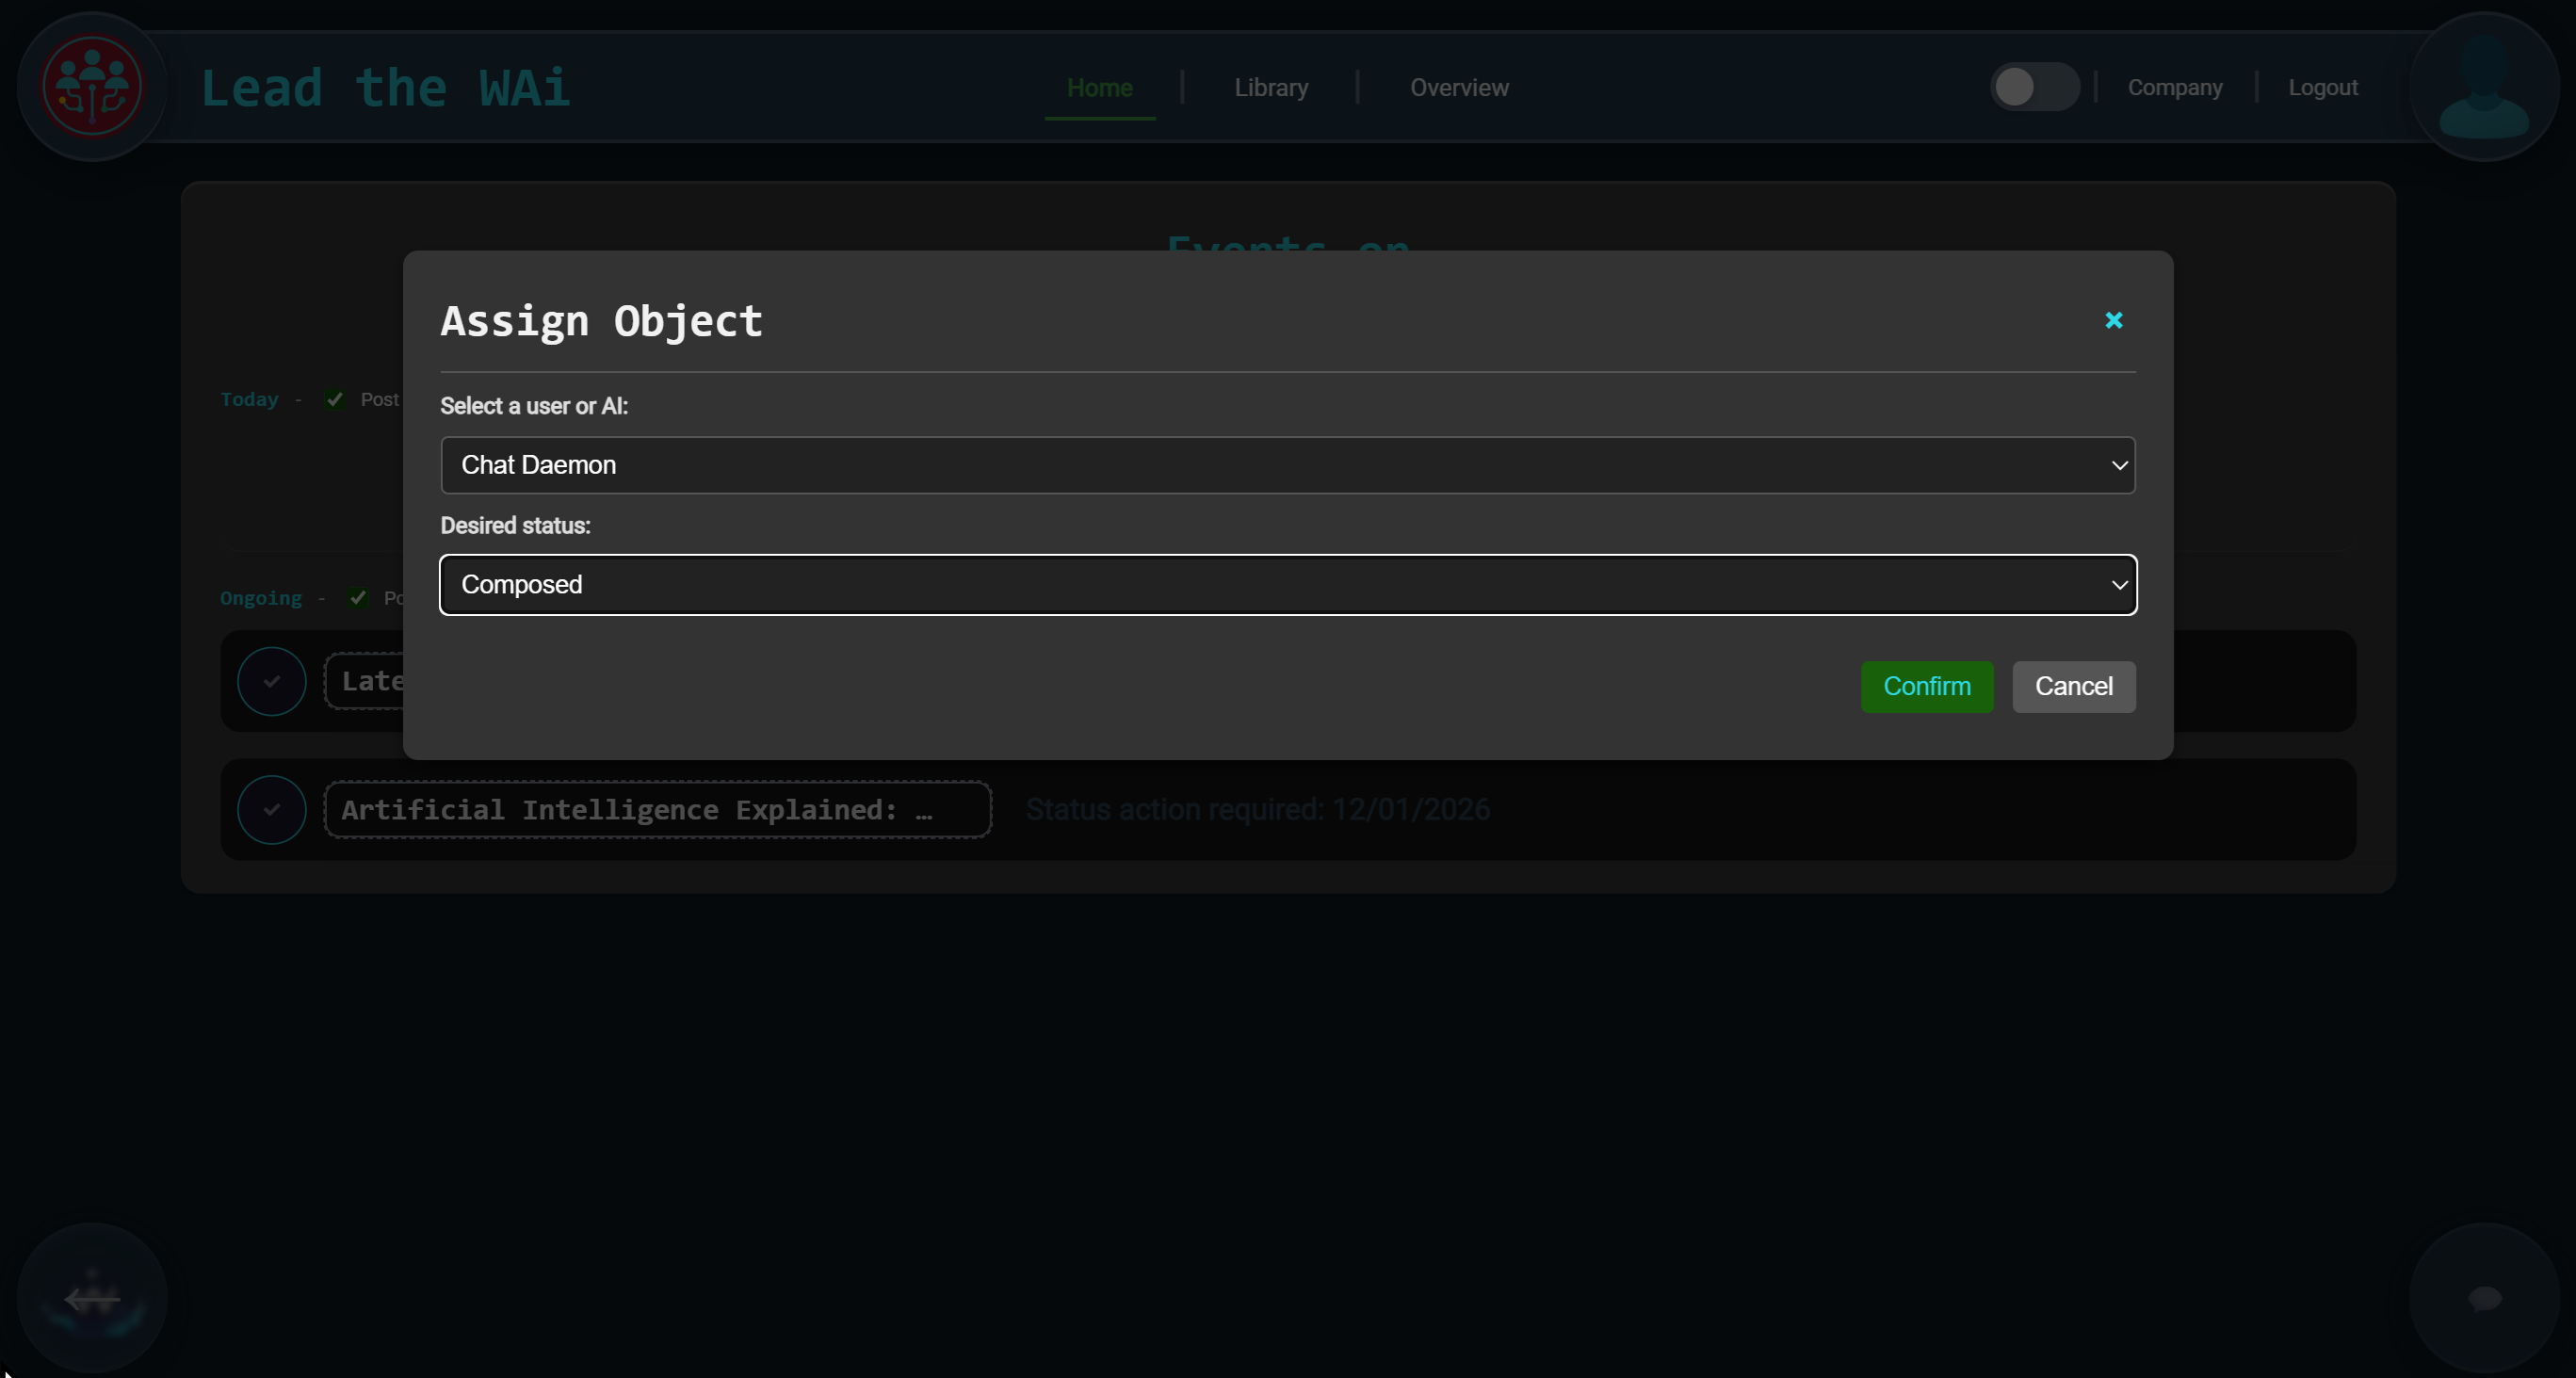
Assigning Work to an AI Agent
Moving Beyond Today: The Library View
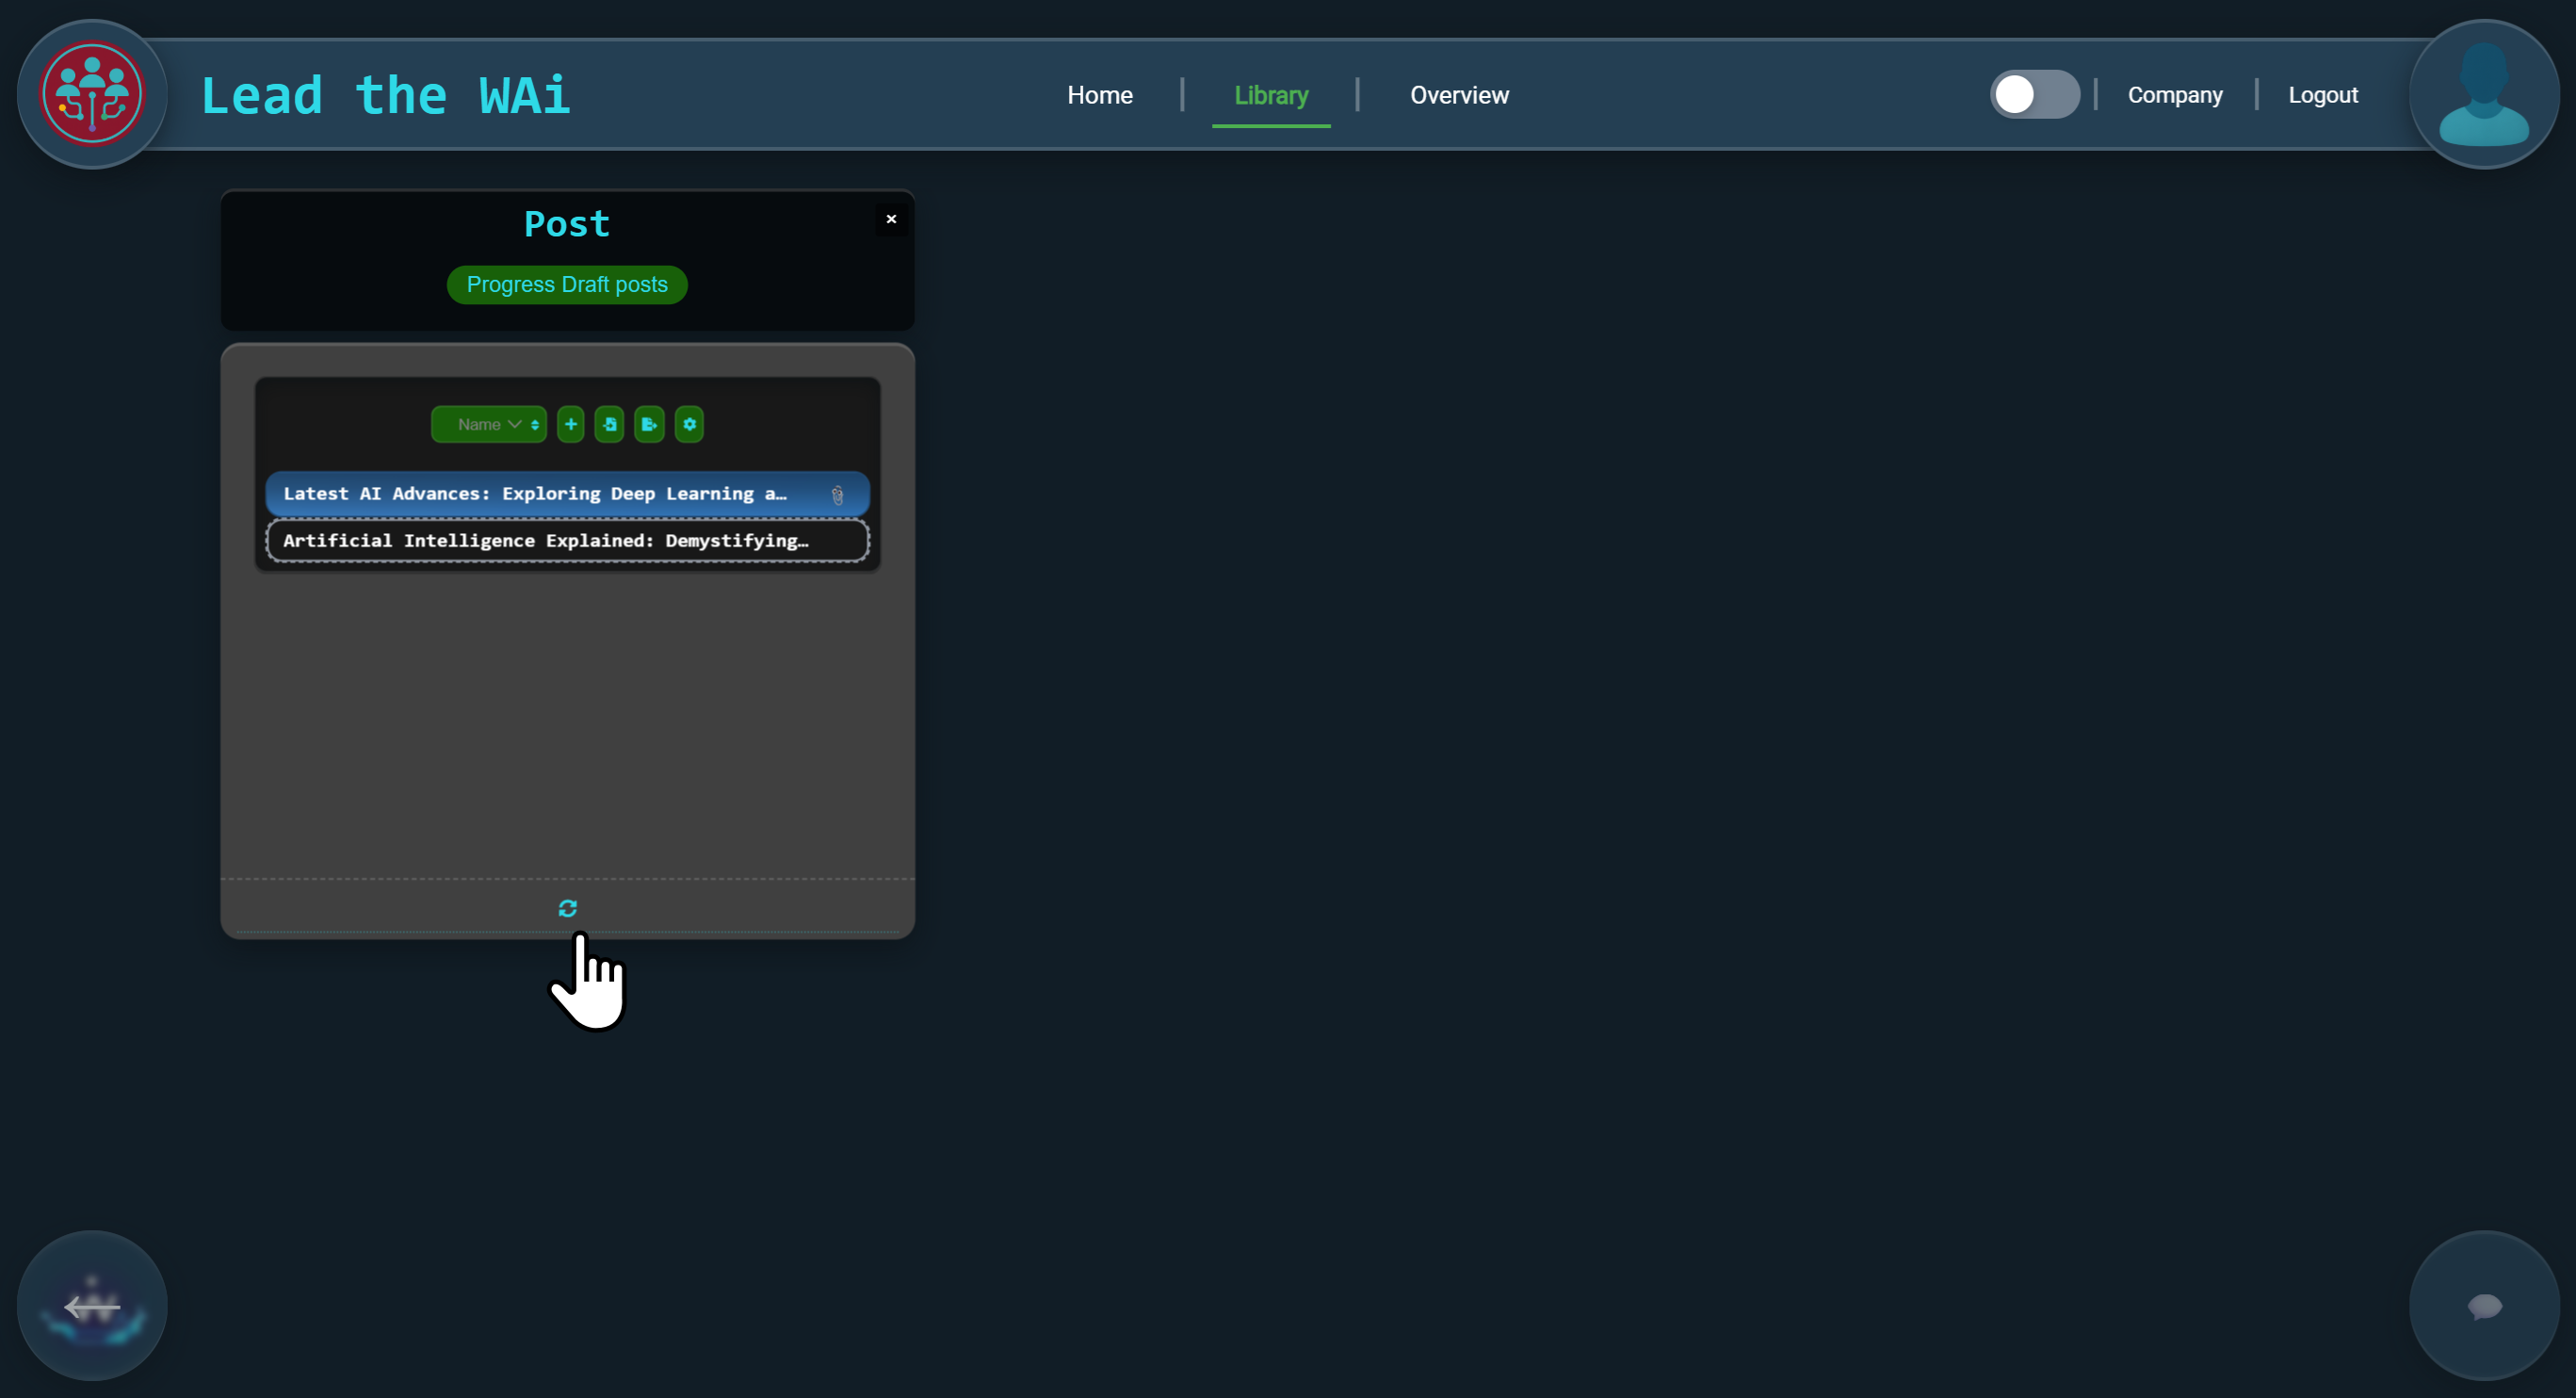
The Home page helps you decide what to do next. The Library shows you what you’ve built.
When you open the Library and view your Posts, the first thing you see is a visual snapshot of progress.

Half of the posts are still drafts. Half are composed. This mirrors exactly what happened on the Home page — nothing new, just clarity.
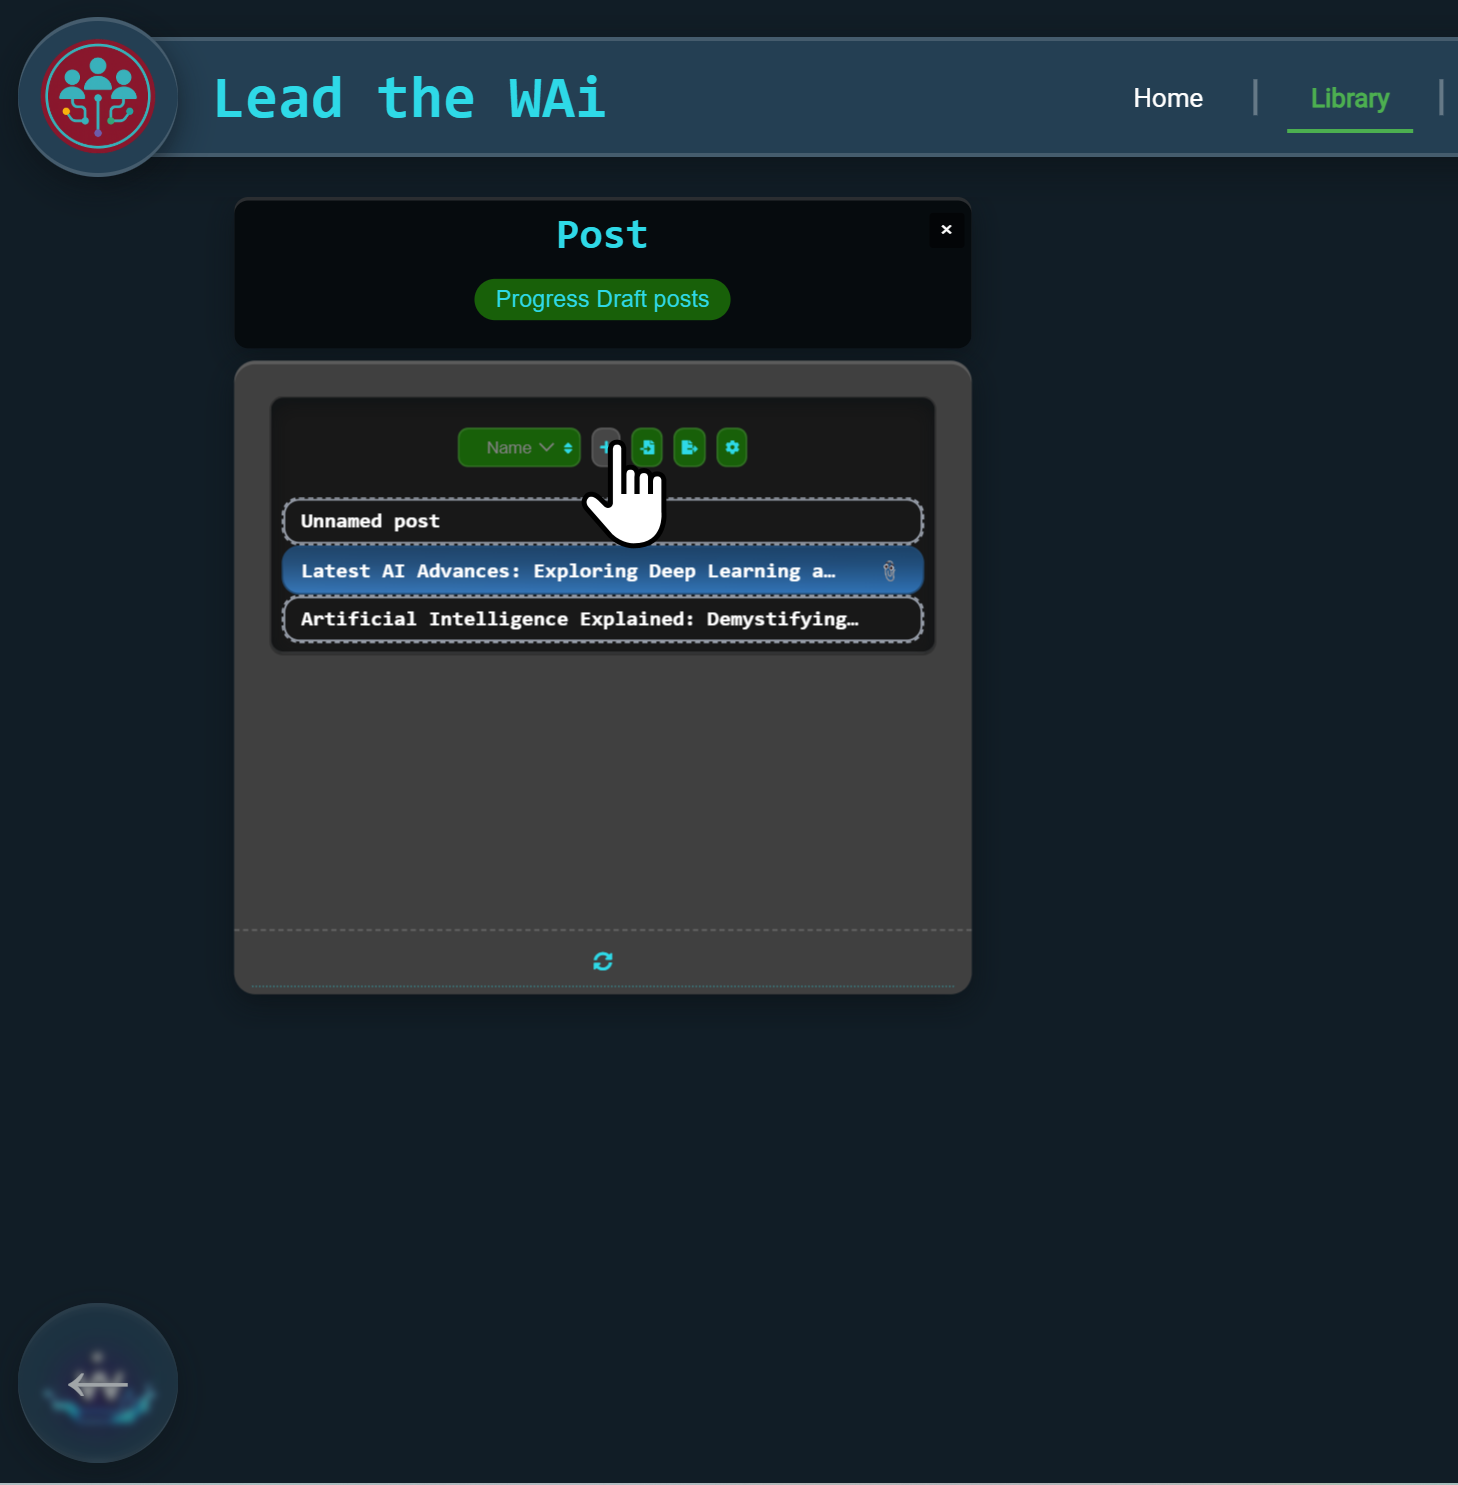
Flipping the Tile: Seeing the Objects
Flipping the tile reveals the individual objects themselves. Clicking any of them opens the same object popup you’ve already seen.
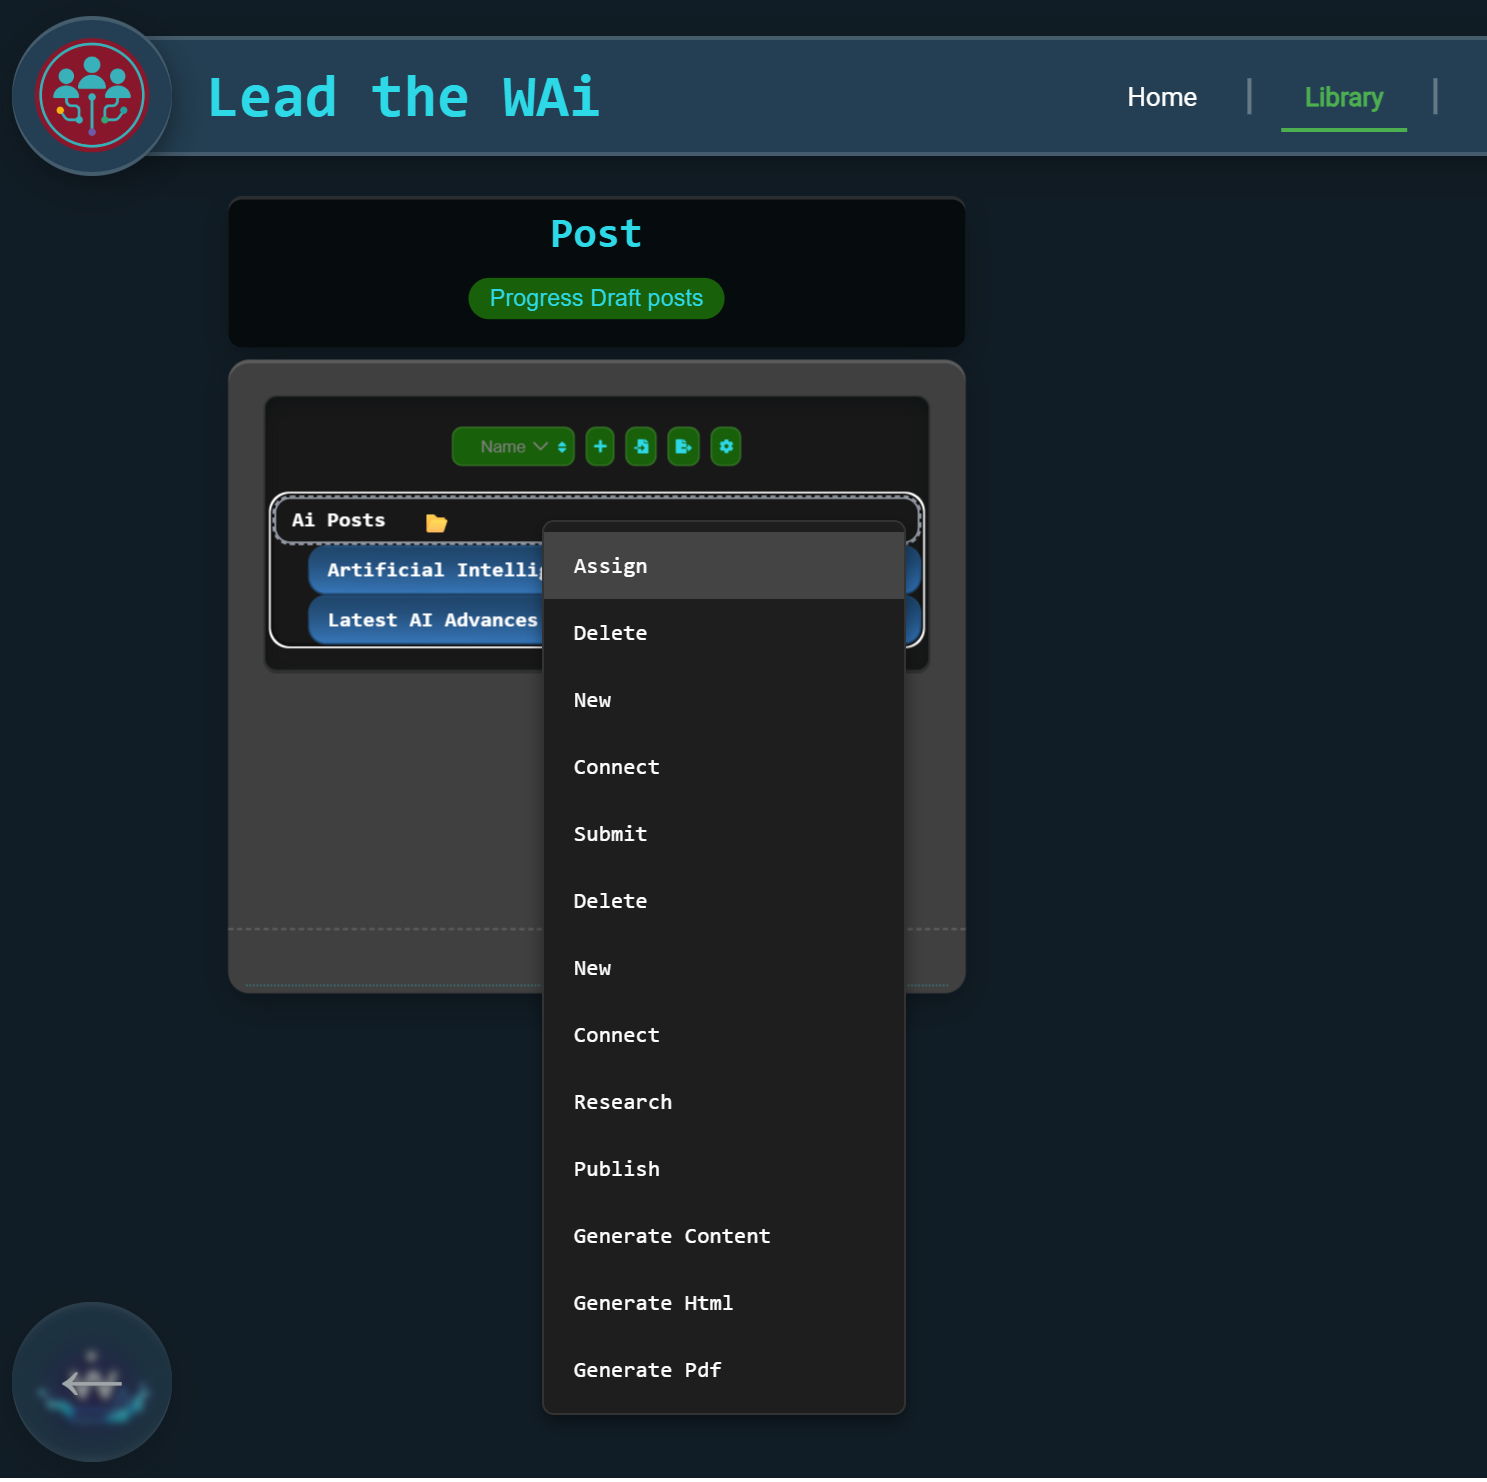
Creating a Folder with Meaning

Dragging the two AI-related posts into this folder creates shared context.
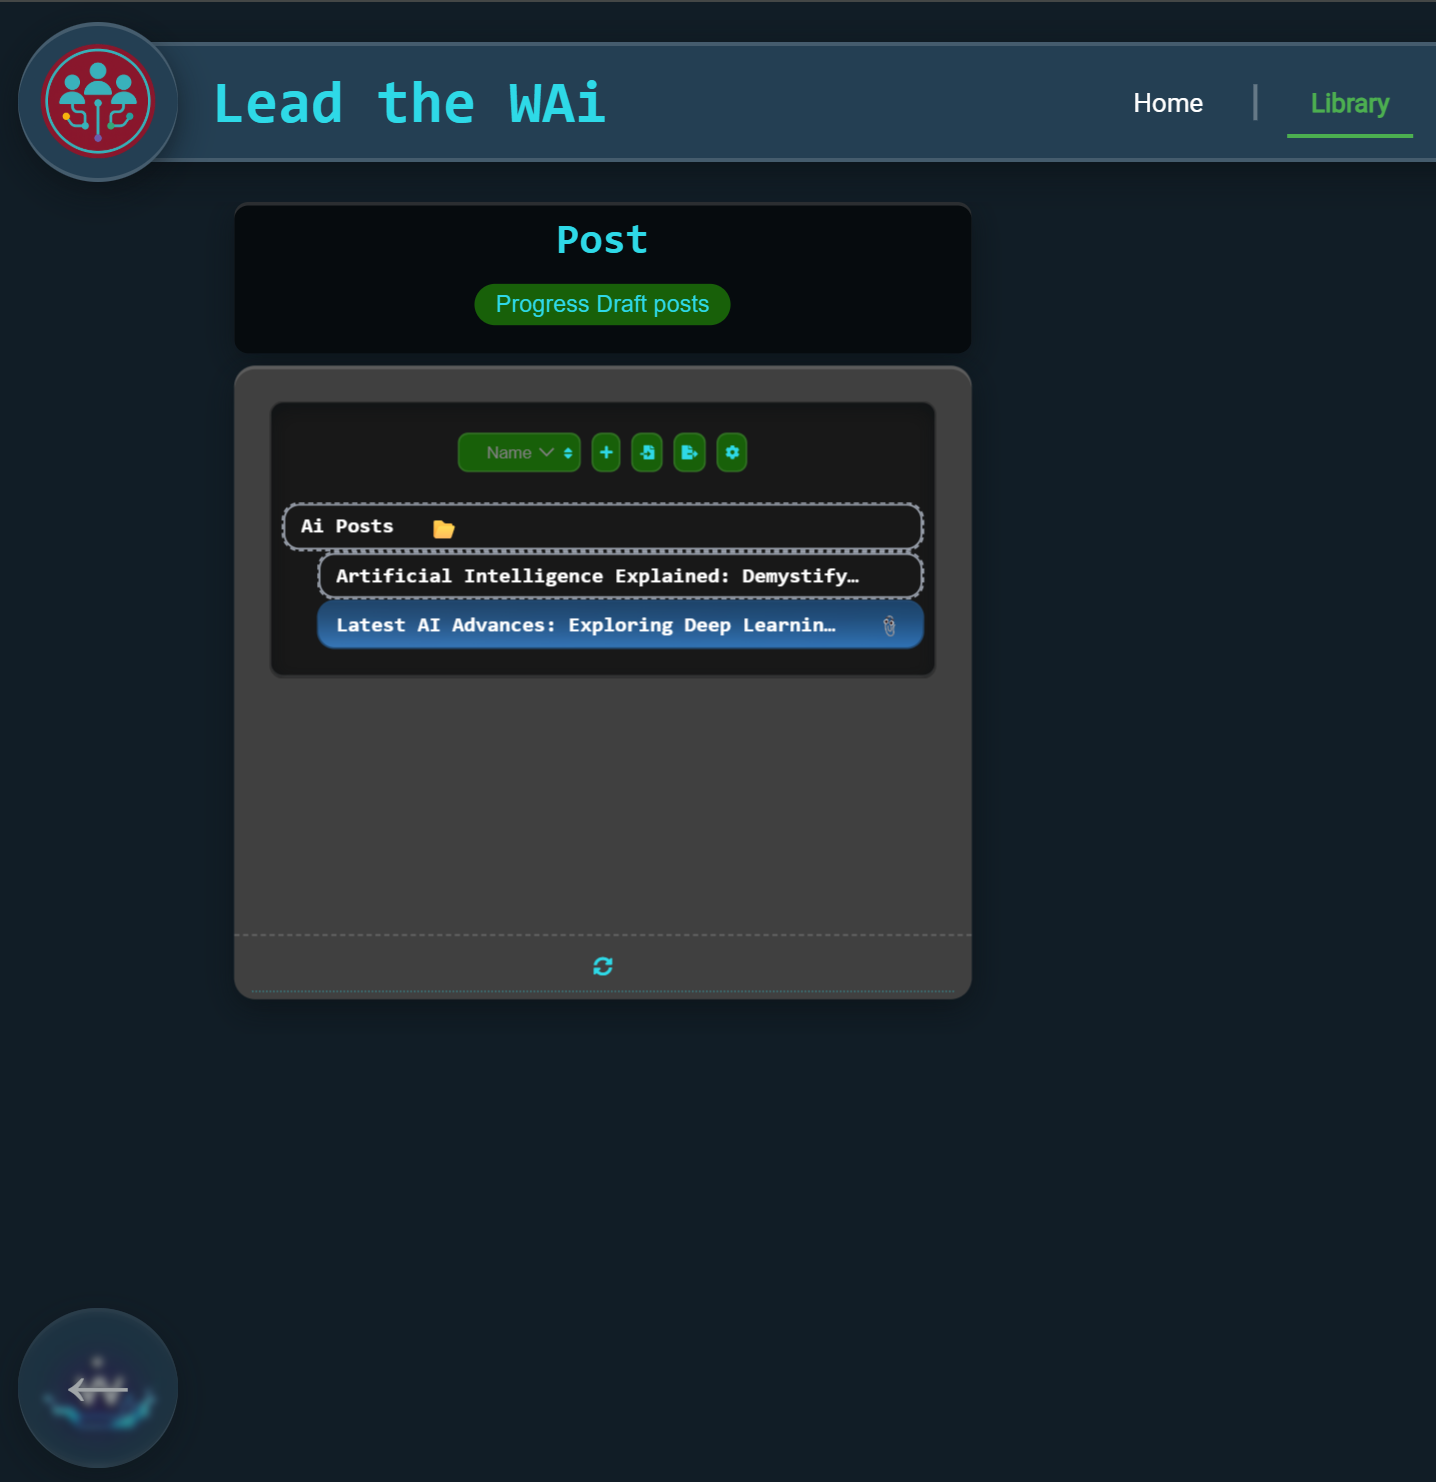
Once the posts live inside the folder, they inherit shared context that improves downstream automation.
Context Drives Better AI Output
When Chat Daemon composes the post inside the folder, it automatically respects the folder’s description. The tone shifts to informal, without you needing to restate anything.
By the end of this stage, you’re no longer just creating content. You’re shaping how AI behaves through structure, context, and intent.
From Folder to Workflow: Scheduling as the Default
Now that both posts inside AI Posts are composed, the folder becomes more than just a neat way to organise content. It becomes a lightweight workflow.
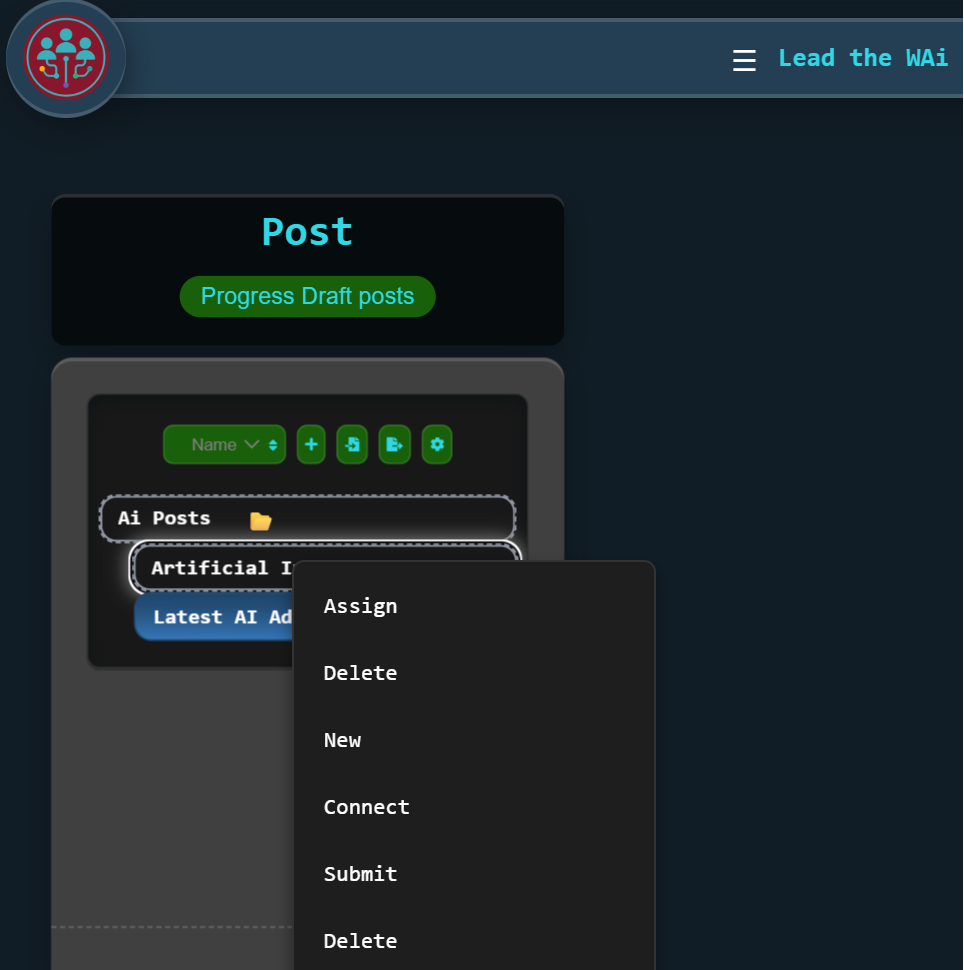
Instead of assigning each post individually, you can assign the folder itself to Chat Daemon — this time with a desired status of Scheduled.
Assigning the folder sets the expectation for how far content inside it should progress.
This changes how the system behaves moving forward:
Any post that belongs to the AI Posts folder can now be pushed all the way through to Scheduled automatically — without you micromanaging each step.
It’s the same idea as delegation in a team. You’re not just asking for help with one task — you’re defining the outcome you want as the default.
Seeing the Bigger Picture: Your Content in the Overview
Once content starts getting scheduled, you naturally want visibility. Not just “what exists”, but when things are happening.
Instead of clicking through objects one by one, you can simply ask:
“Can you show me my posts in a chart”

You can use natural language to navigate directly to the insight you want.
Lead the WAi then takes you to the Overview page, where your posts appear on a timeline.
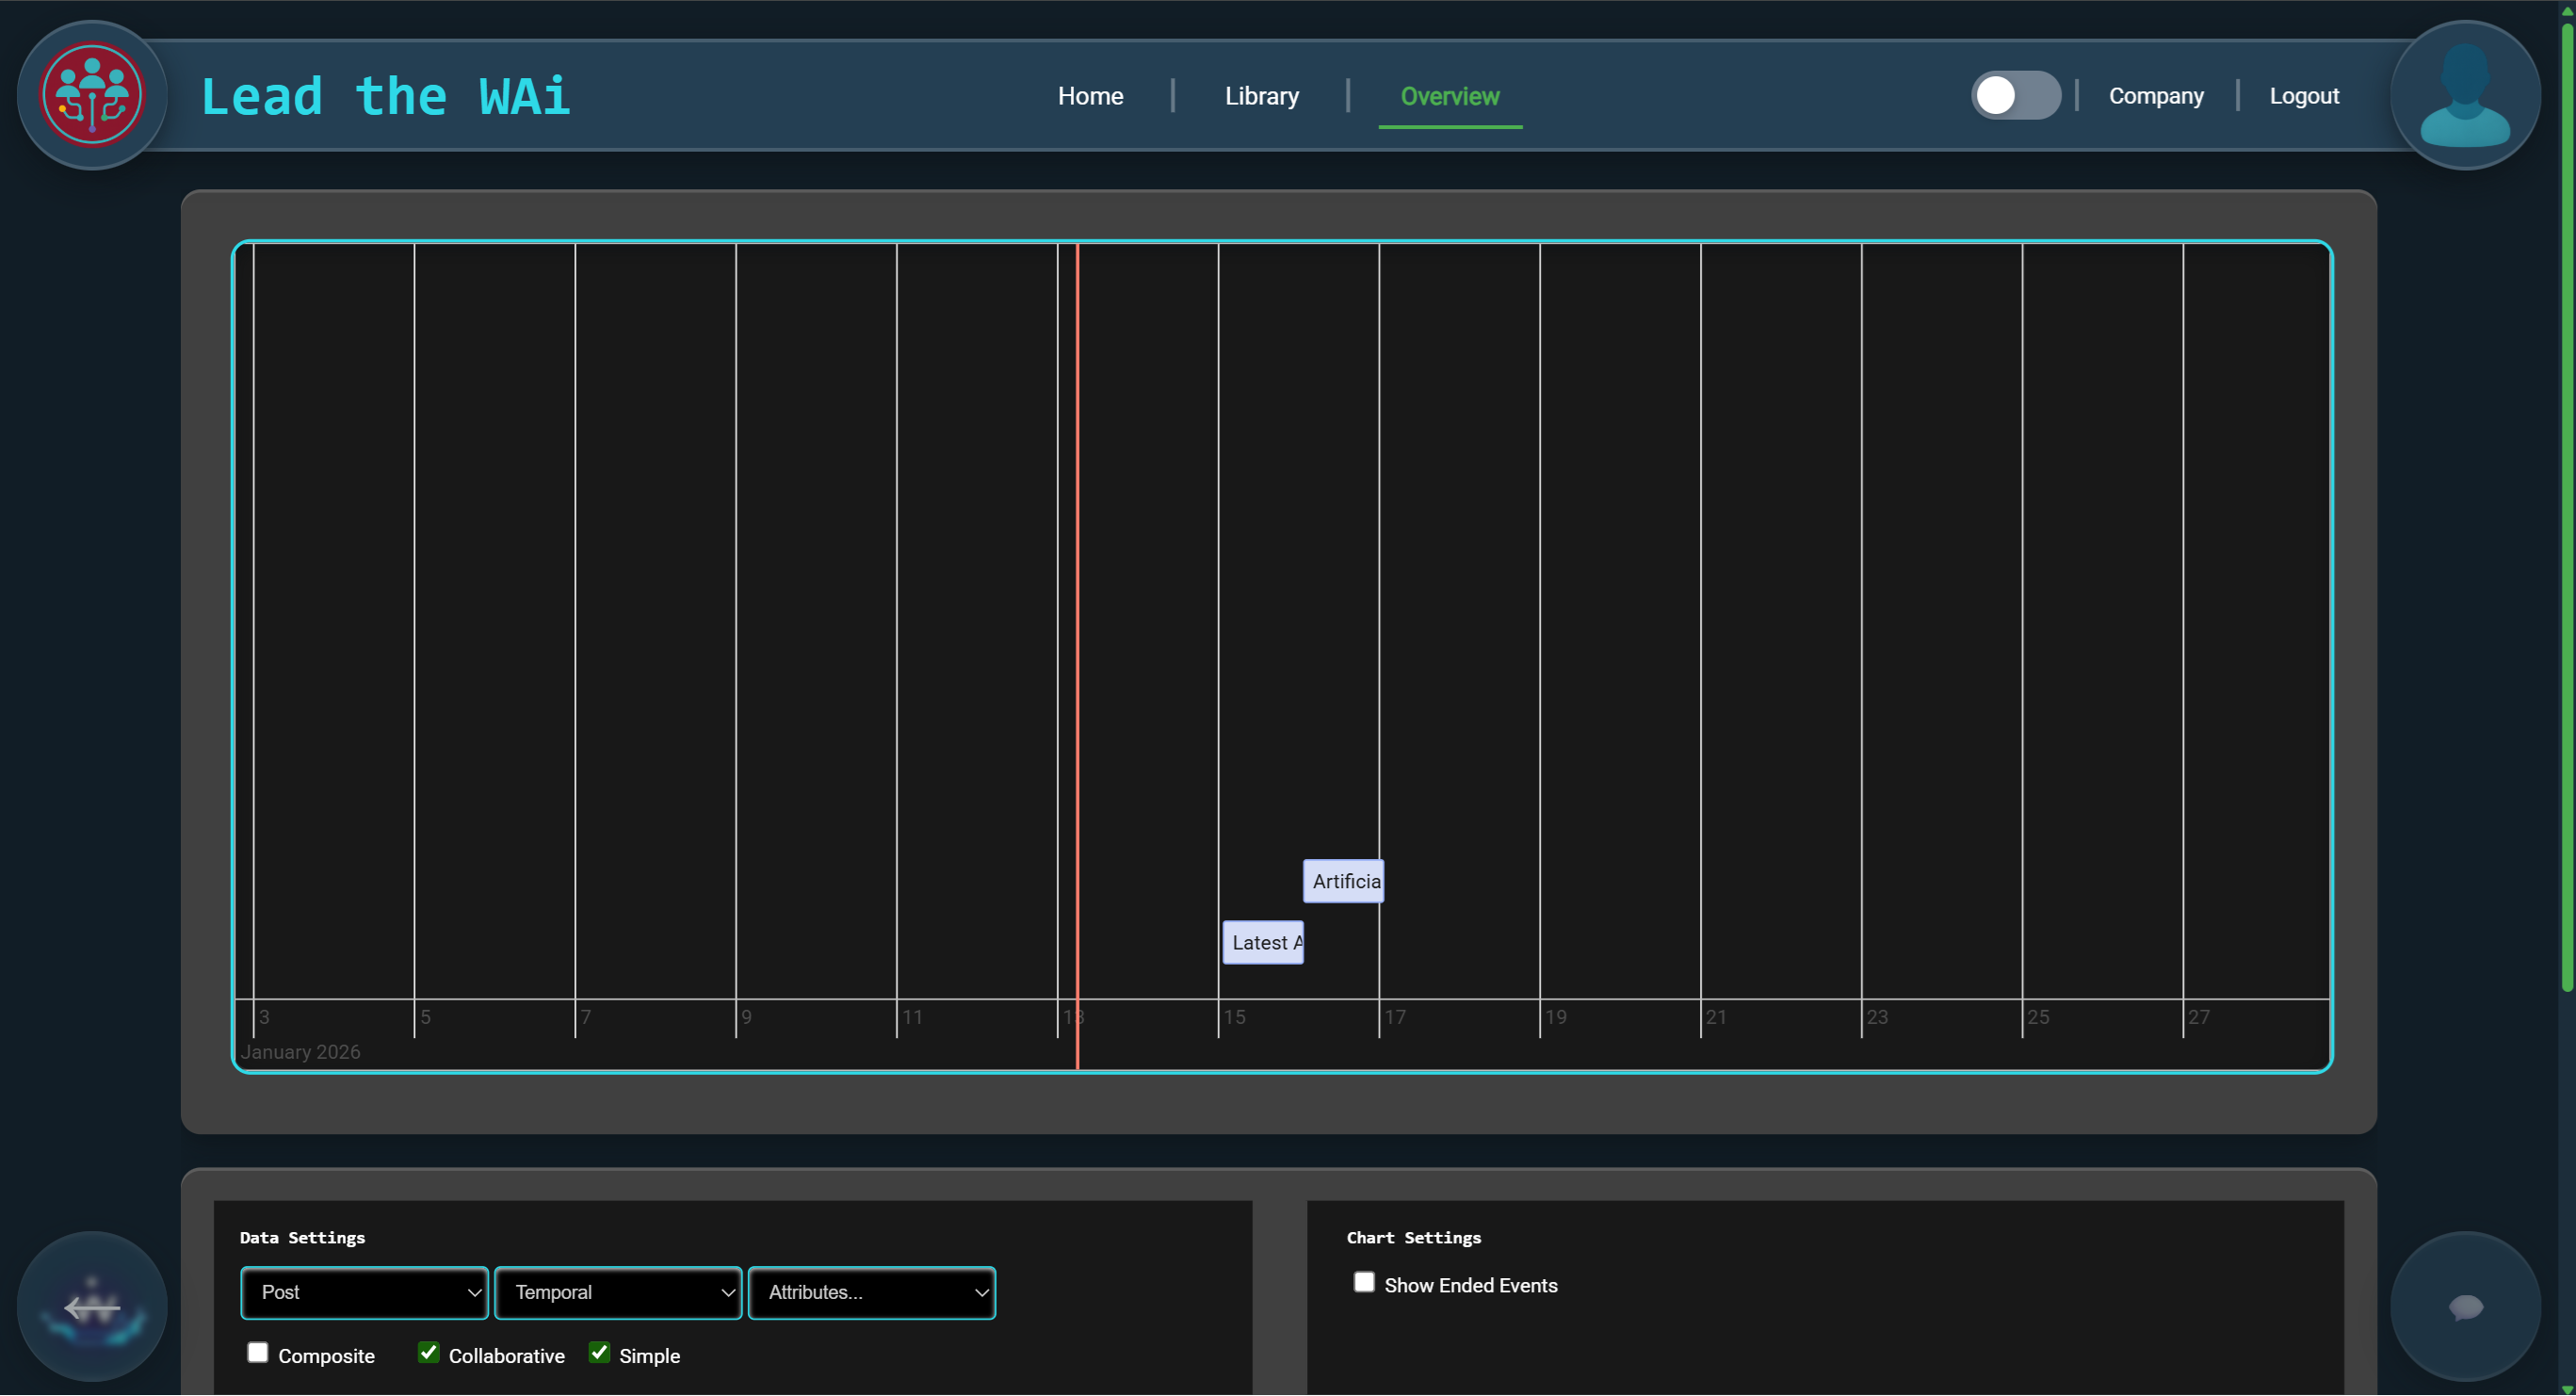
The Overview page turns your scheduled posts into a visual plan you can understand at a glance.
This is the moment your first week stops feeling like “testing a platform” and starts feeling like managing a real system. You’re no longer juggling tabs, reminders, and scattered notes — you can see your content pipeline as a timeline.
And the best part is that it happened naturally: ideas became objects, objects became folders, folders became workflows, and workflows became a plan.
This is what “manageable” feels like.